Use Workflow Timeline Actions
Last updated: Apr 20, 2026
Cancel or Reassign a Task or Workflow
At some point, you may want to either cancel or reassign a task or a workflow, for example, in the event that it is no longer needed or a mistake has been made.
Tip
You can update the due date for all tasks in a workflow by navigating to the Timeline View () and selecting the Update Workflow Due Date from the Actions menu ().
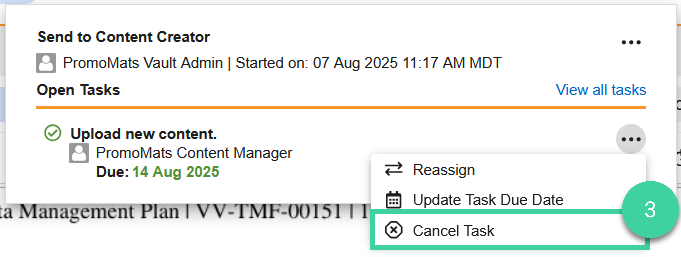
Cancel a Task
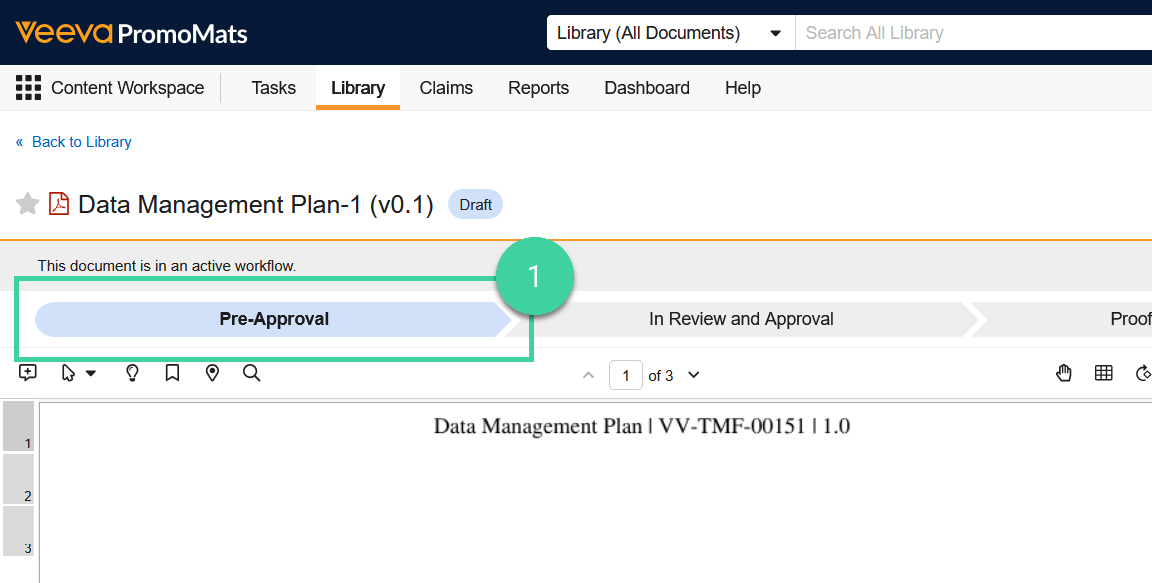
Within the document that is involved in the task, click the workflow name to open the task and workflow details.
Click the Actions menu () on the task.

Select cancel task.
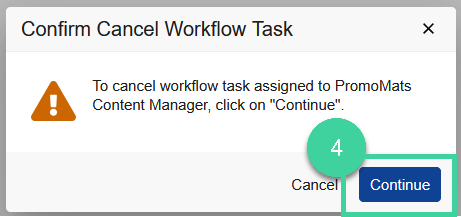
In the confirmation popup, click continue to cancel the task.
Cancel a Workflow
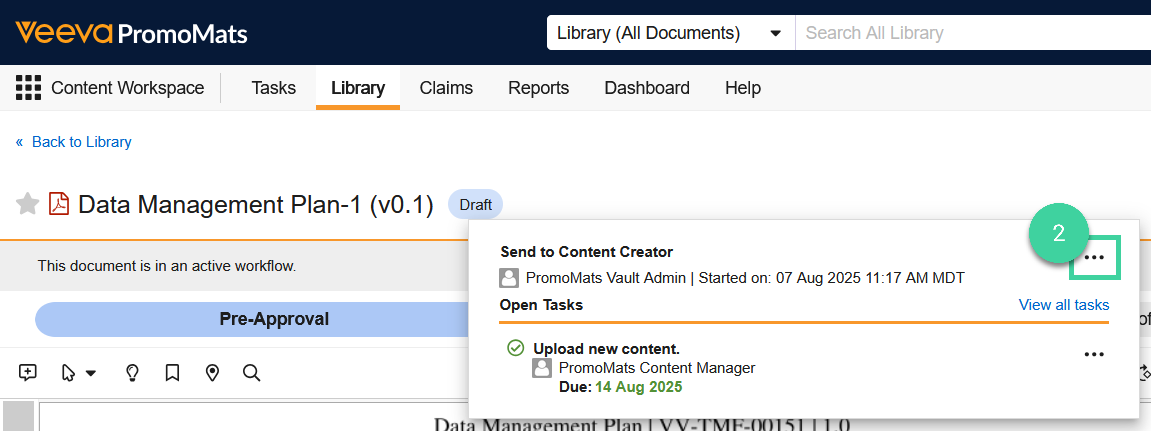
Within the document that is involved in the workflow, click the workflow name to open the task and workflow details.
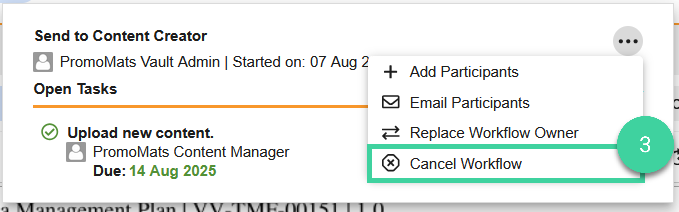
Click the Actions menu () on the workflow.
Select cancel task.
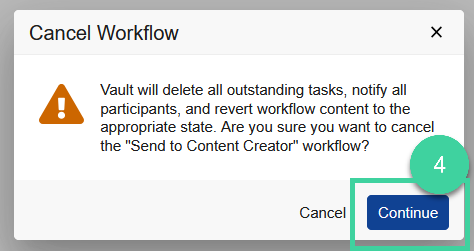
In the confirmation popup, click continue to cancel the workflow.
Reassign a Task
Within the document that is involved in the task, click the workflow name to open the task and workflow details.
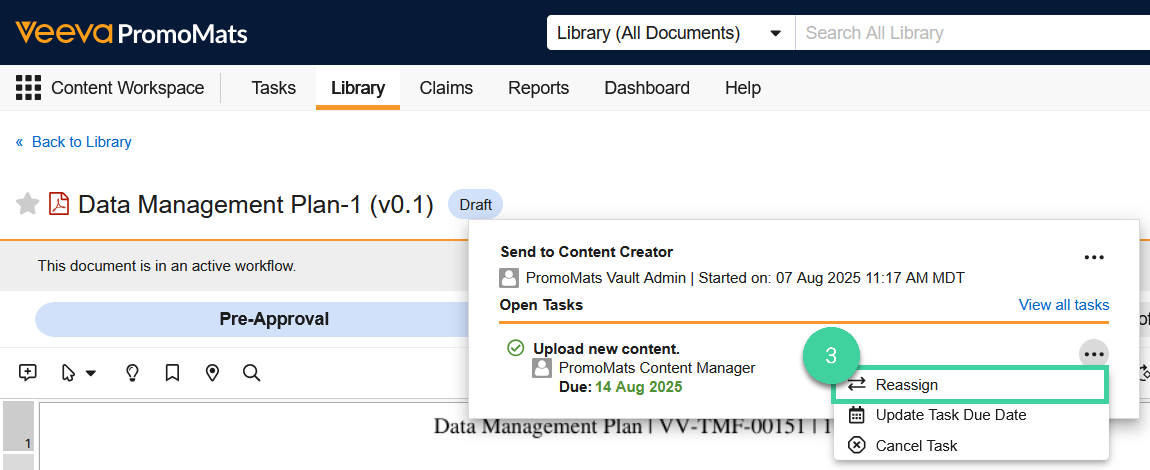
Click the Actions menu () on the task.
Select reassign task.
In the popup, select a user to assign the task to.
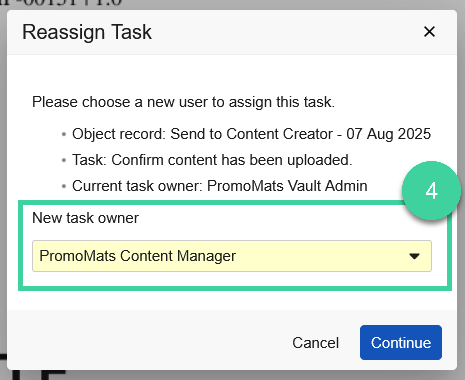
Click continue to reassign the task.

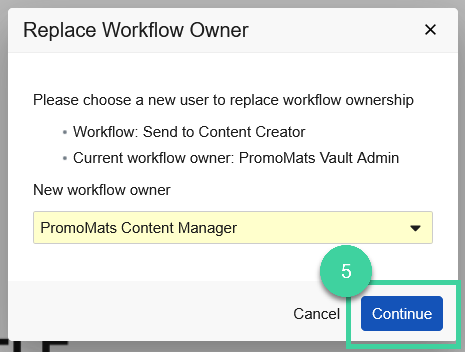
Reassign a Workflow
Within the document that is involved in the task, click the workflow name to open the task and workflow details.
Click the Actions menu () on the task.
Select replace workflow owner.

In the popup, select a user to assign as the workflow owner.
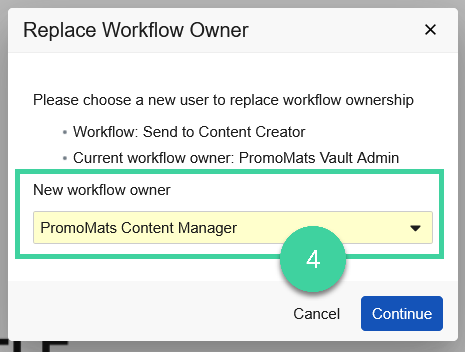
Click continue to reassign the workflow.
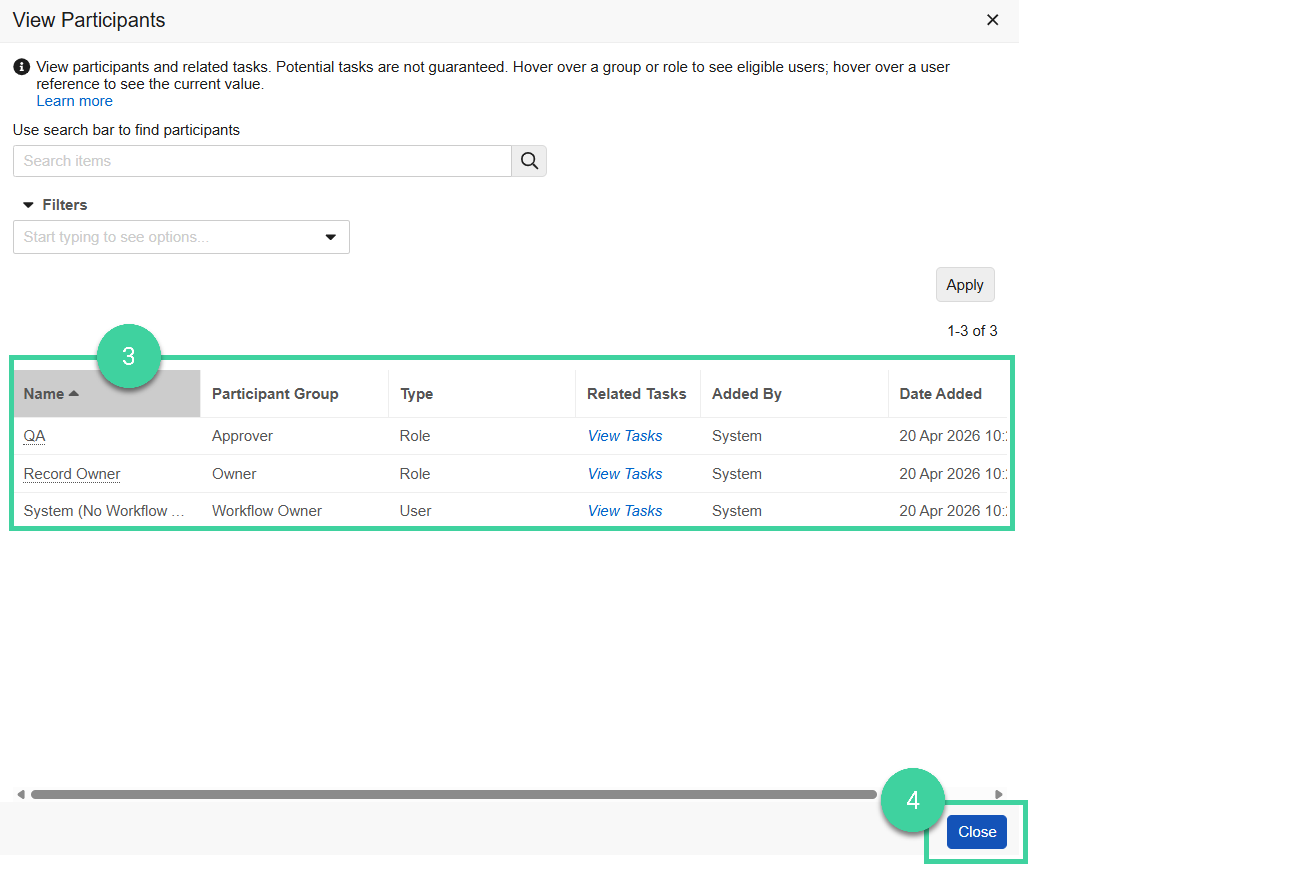
View Workflow Participants
Document Workflows
To view all participants in a document workflow:
Navigate to the document Timeline View.
Select View Participants from the All Actions menu of the workflow action.

The workflow participants are listed. Hover over a group or role to see eligible users.
Click Close.

Object Workflows
To view all participants in an object workflow:
Navigate to the Workflow Timeline.
Select View Participants from the All Actions menu of the workflow action.
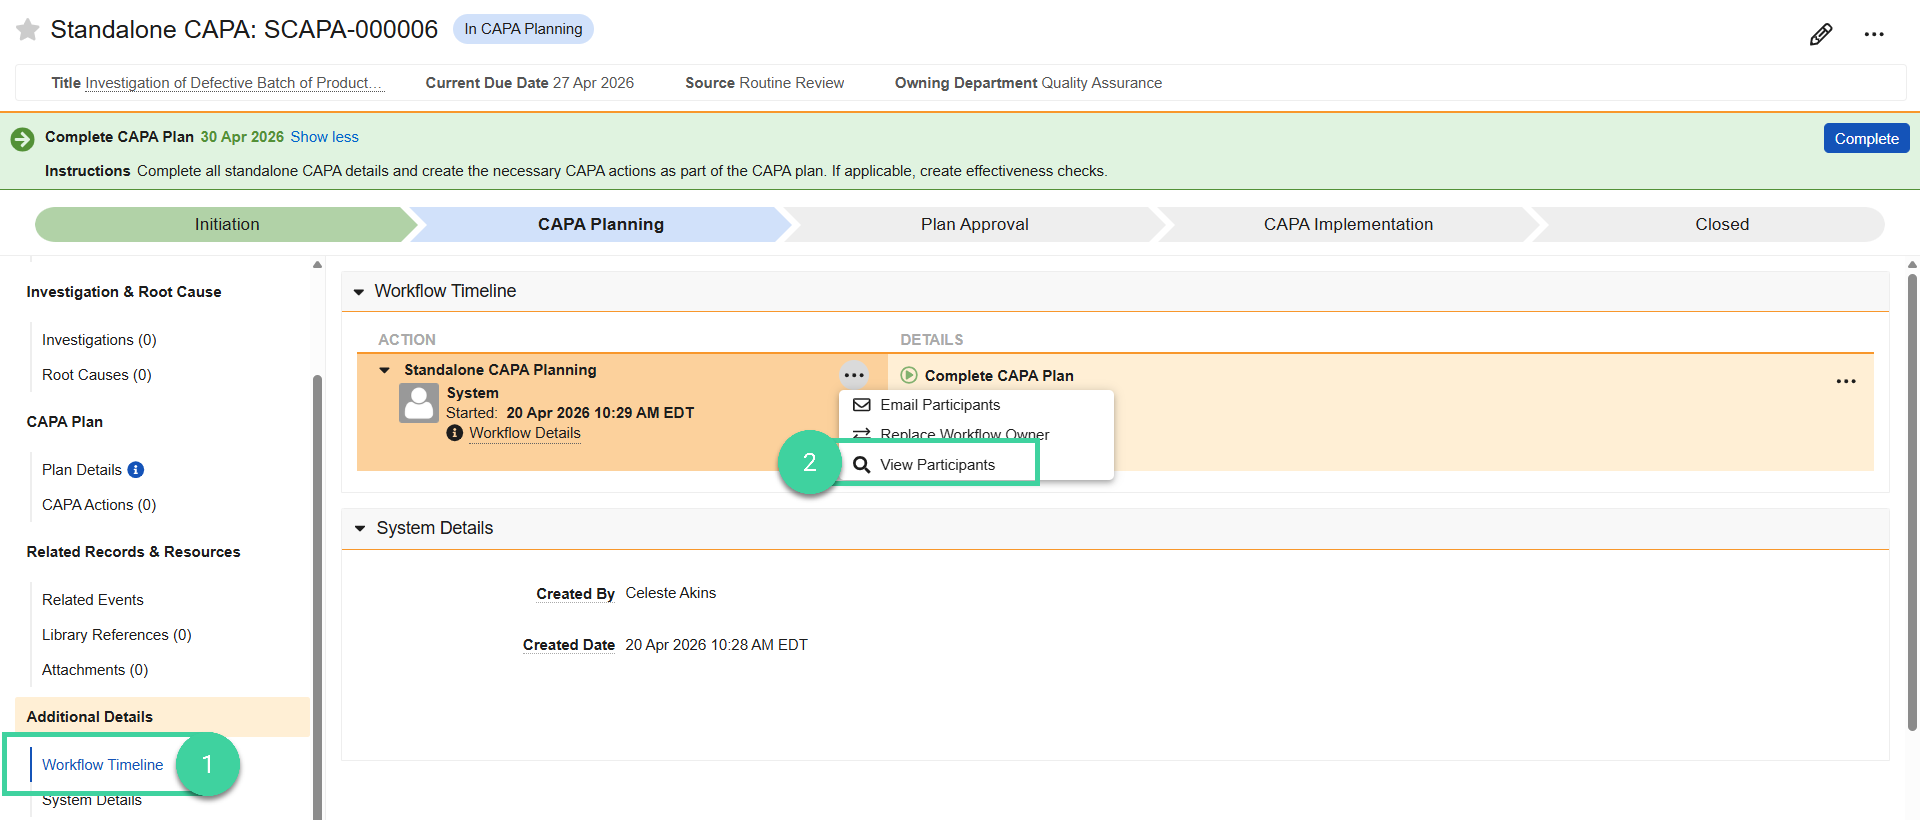
The workflow participants are listed. Hover over a group or role to see eligible users.
Click Close.