Create Account Views & Lists
Last updated: Apr 17, 2026
Who can complete this task?
Vault CRM Basics: Medical User, Vault Admin
You can create views and lists of accounts in your database to help keep them organized.
Lists are collections of accounts only visible to you.
Views are customizable by account types, where it pulls the data, what columns will be displayed, and any search criteria you define. Views can also be shared with other users within Vault CRM Basics.
Lists
To create a new list:
Navigate to Medical CRM > My Accounts > View and Lists and click + in the Lists section.

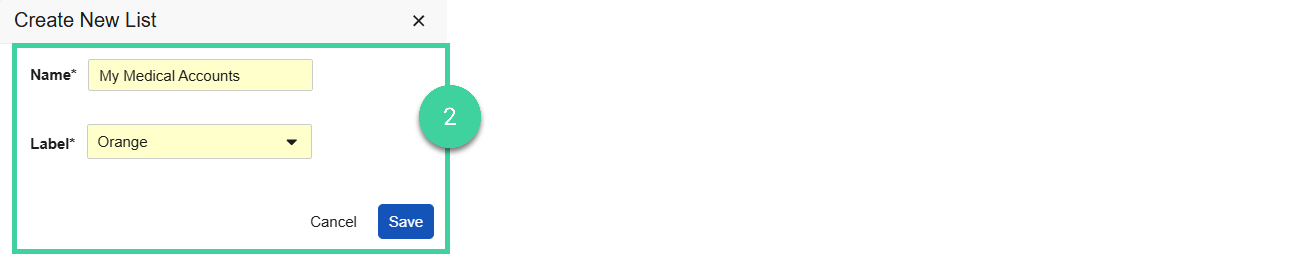
Enter a Name for the list, select a color for the Label and click Save.
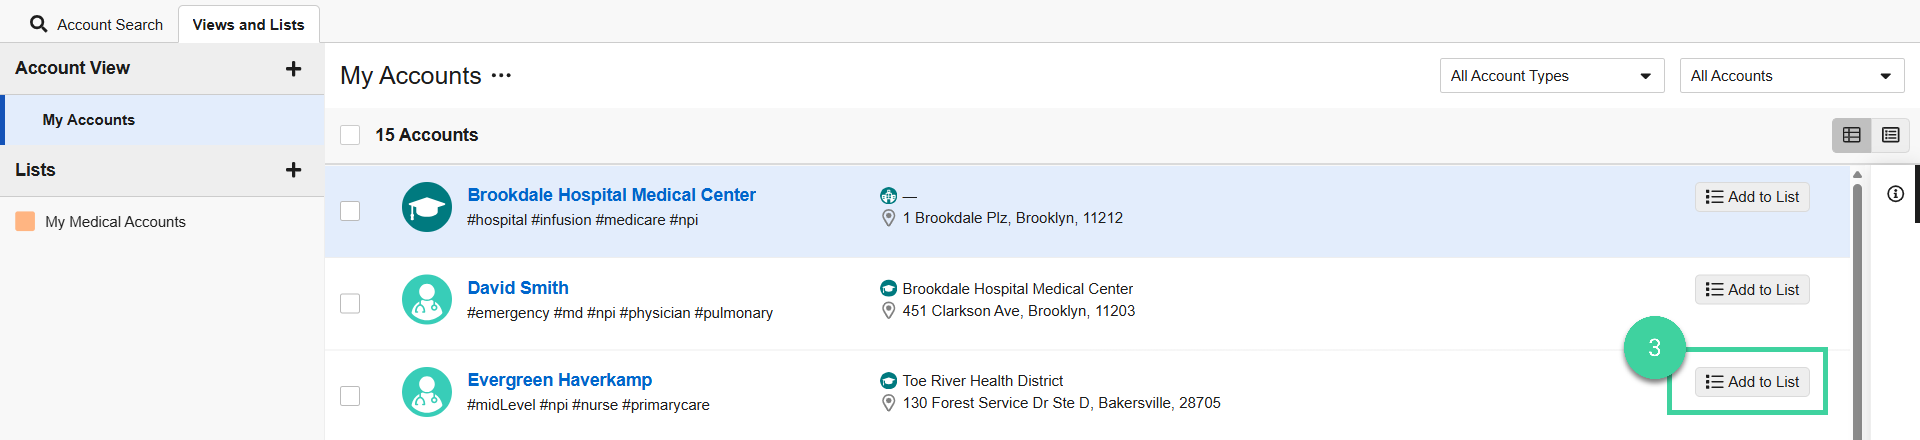
From the My Accounts view, click Add to List for each account you want to add to a list.
From the Add to dropdown, select the list you want to add the account to. Then click OK.

The list will be added to the Lists section.
Views
To create a new account view:
Navigate to Medical CRM > My Accounts > View and Lists and click + in the Account View section.

Fill out the required details:
- View Name: Provide a name for the view.
- Account Types: Select the account types (Institution and/or Professional) that you want to include in the view.
- Visibility: Select the visibility of the view. You can choose to keep it hidden from all users, visible to all users, or accessible by profile, where you will then need to associate a profile for the view.
- Include: Select if you want to include all accounts or only accounts you own, along with your preferred addresses or all addresses.

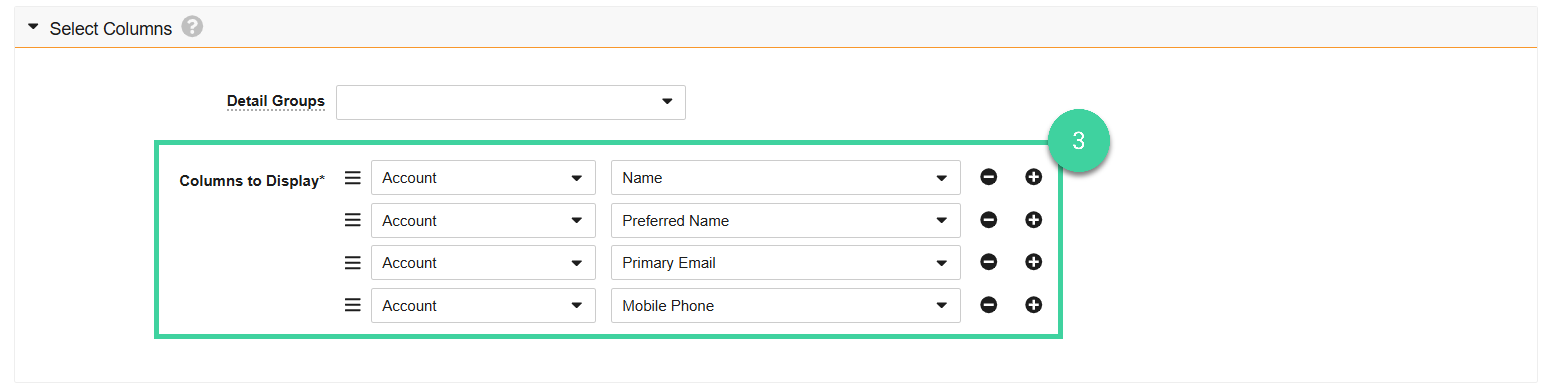
Select the columns to display in the view. You can add or remove columns by using the plus () or minus signs () next to the set column.
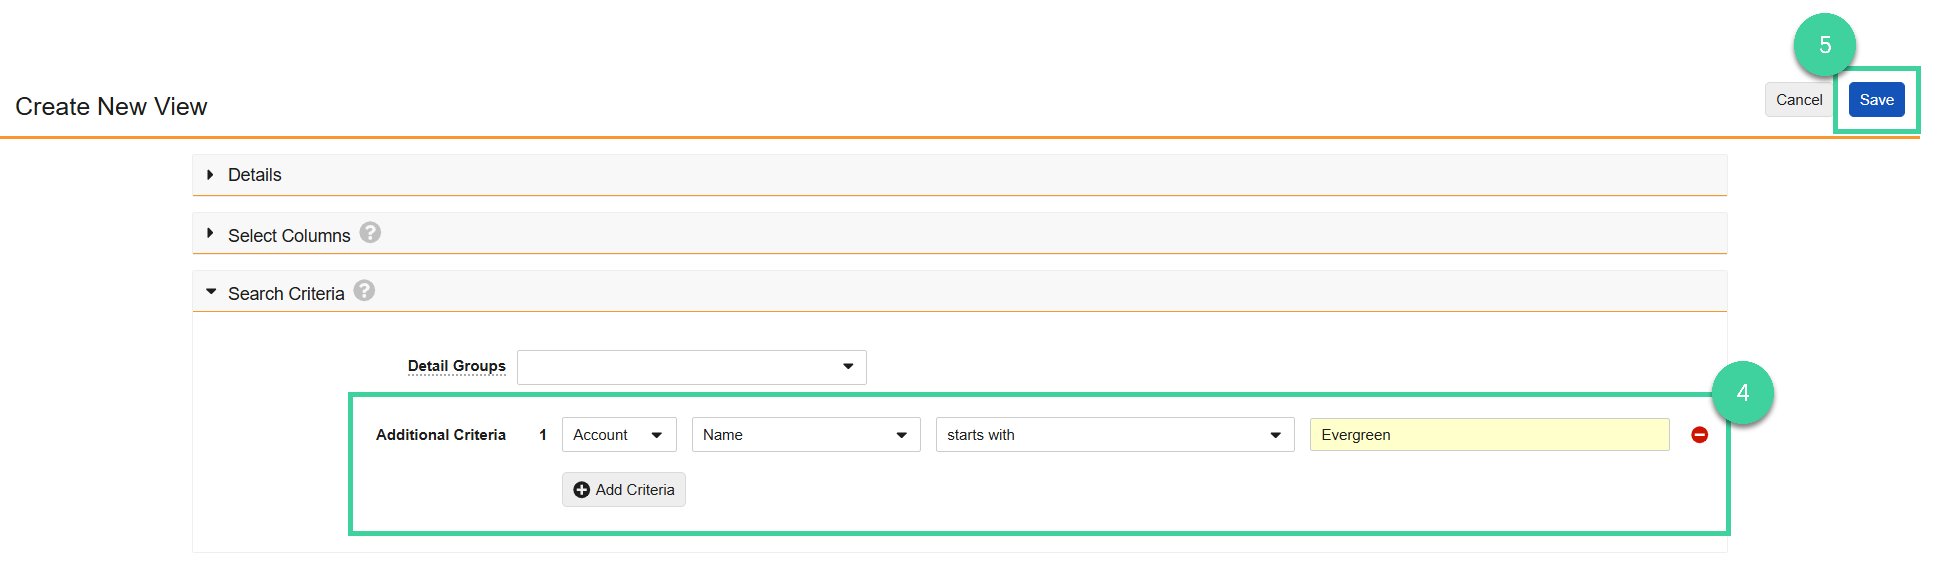
Add additional search criteria to further restrict the list of accounts in the view. This allows you to create a very specific list to only show accounts that satisfies all criteria added. To add additional criteria to the view, click Add Criteria.
Click Save.
The view will be added to the Account View section.
Edit, Delete, or Export a View

Edit
To edit a view:
From the account view, select Edit View from the All Actions menu.
Make changes to the view details, columns, and/or criteria and click Save.
Delete
To delete a view:
From the account view, select Delete View from the All Actions menu.
Click Continue to confirm you want to delete the view.
Export
To export a view:
- From the account view, select CSV or Excel from the All Actions menu.