Create a User
Last updated: May 13, 2026
Who can complete this task?
Vault CRM Basics: Vault Admin
Domain Users
Domain users are on your company’s domain, such as your peer employees. This is the most common type for new users.
Create a New Domain User
To create a new domain user:
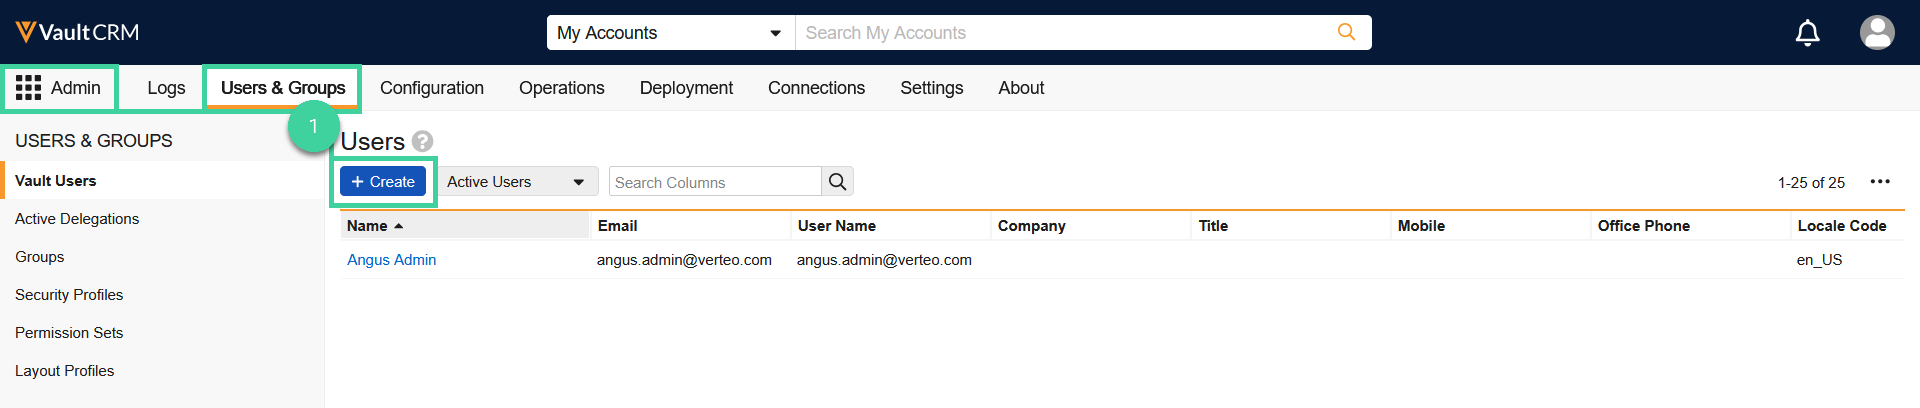
Navigate to Admin > Users & Groups and click Create.
Click Create Domain User from the Domain User dropdown.
Note If the user you want to create already exists in one of your other Vaults, such as PromoMats Basics or RIM Basics, on the same domain, you can add an existing domain user to your Vault.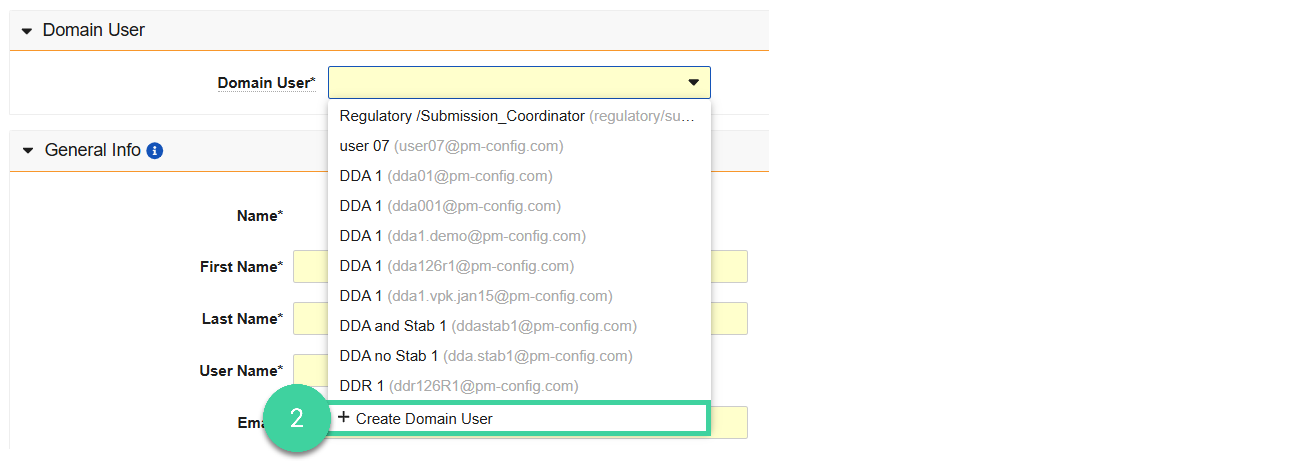
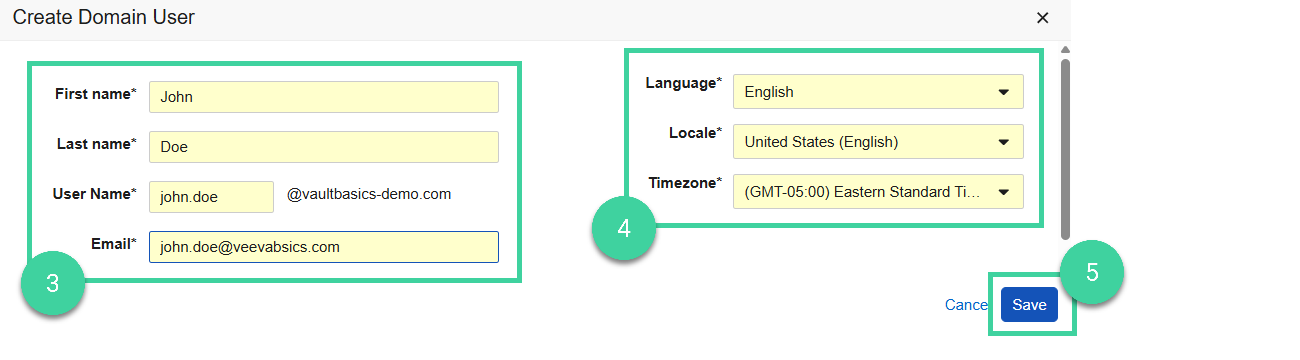
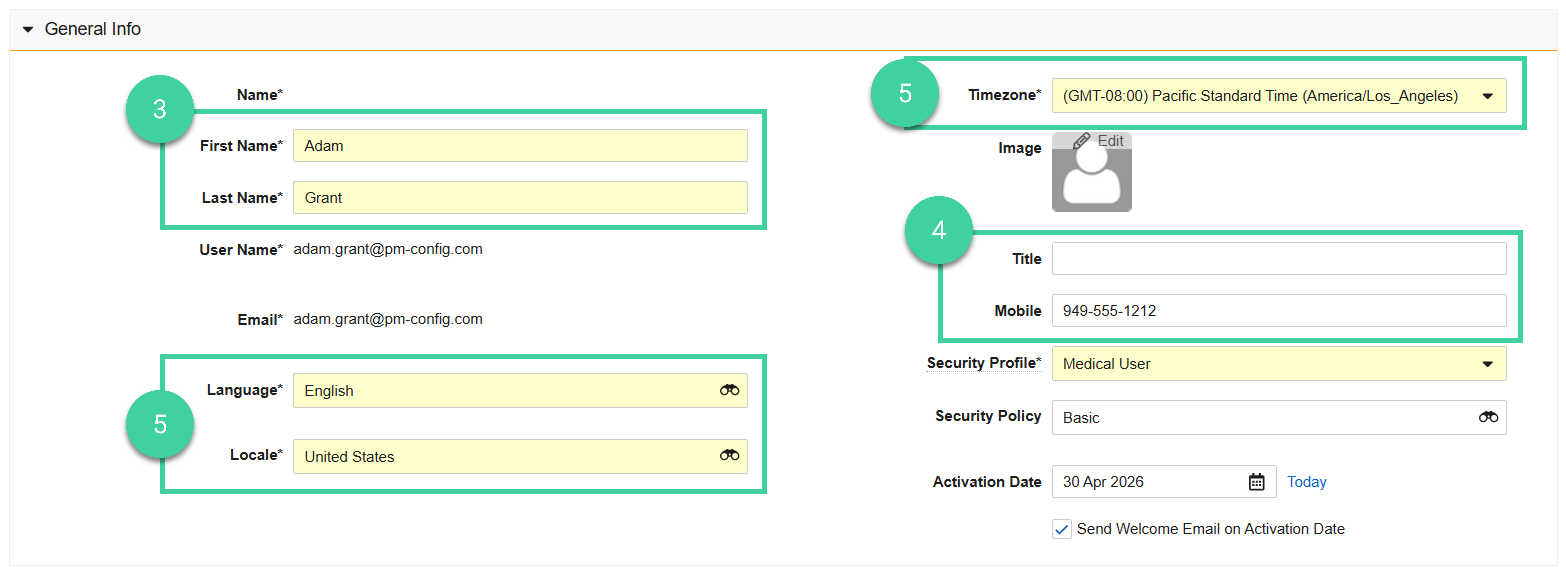
Enter the user’s First Name, Last Name, User Name, and Email.
Note Avoid using mixed case in user names. For example, usefirst.lastinstead ofFirst.Last.Optional: Change the Language, Locale, and Timezone. Vault stores time and date information in UTC (Coordinated Universal Time) but displays that information to users in their local timezones.
Click Save.
Optional: Enter the user’s Title and/or Mobile phone number.
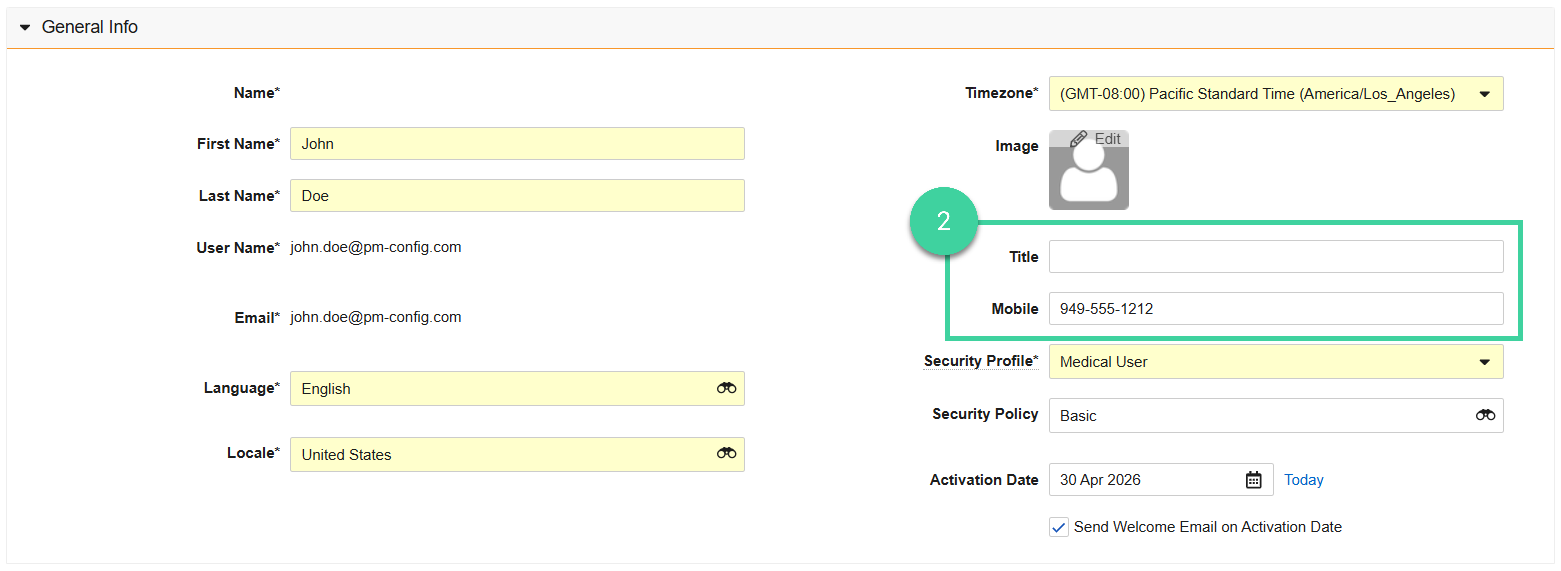
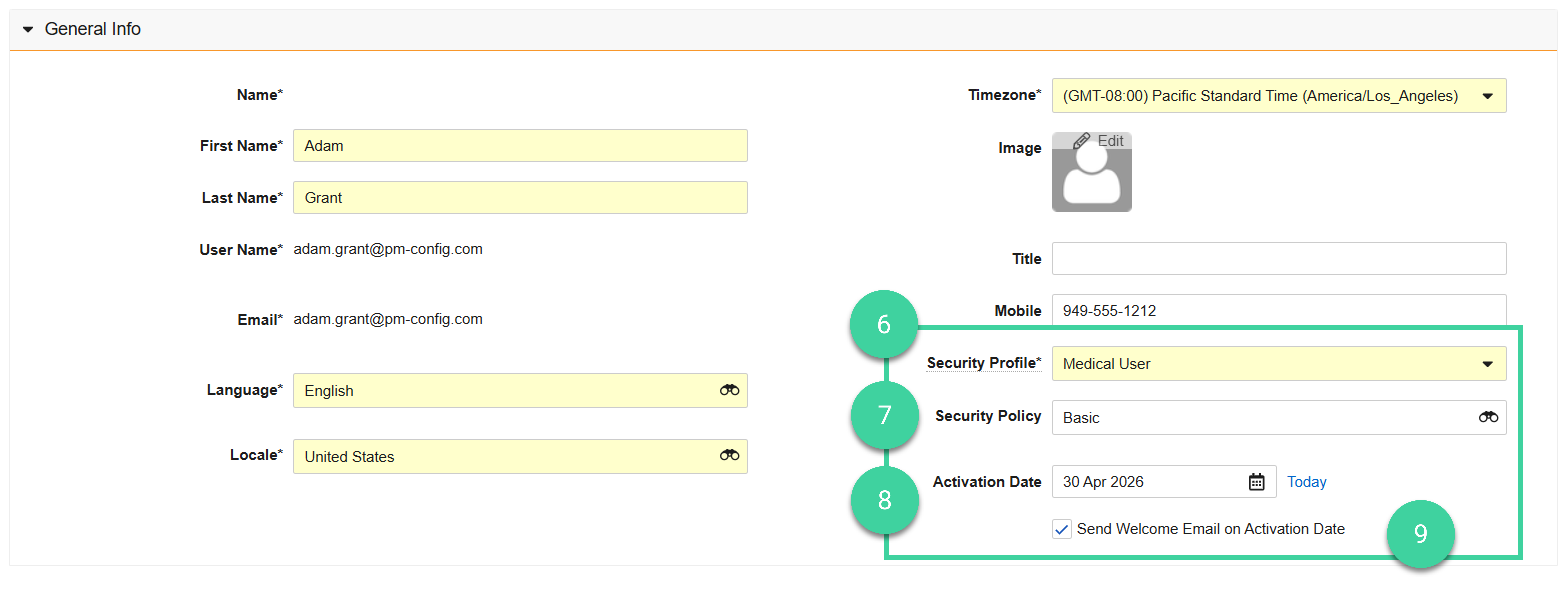
Select the user’s Security Profile.
Select a Security Policy. Vault requires all new users not using SSO (Single Sign-On) to update their password the first time they log in. If your organization uses SSO, select SSO in the dropdown and enter the user’s Federated ID to associate the user record with the user ID used for SSO.
Select the Activation Date if you want the account to become active at a later date, otherwise click Today or leave the date blank to activate the user today.
Ensure that Send Welcome Email on Activation Date is checked if you want the user to receive a welcome email.

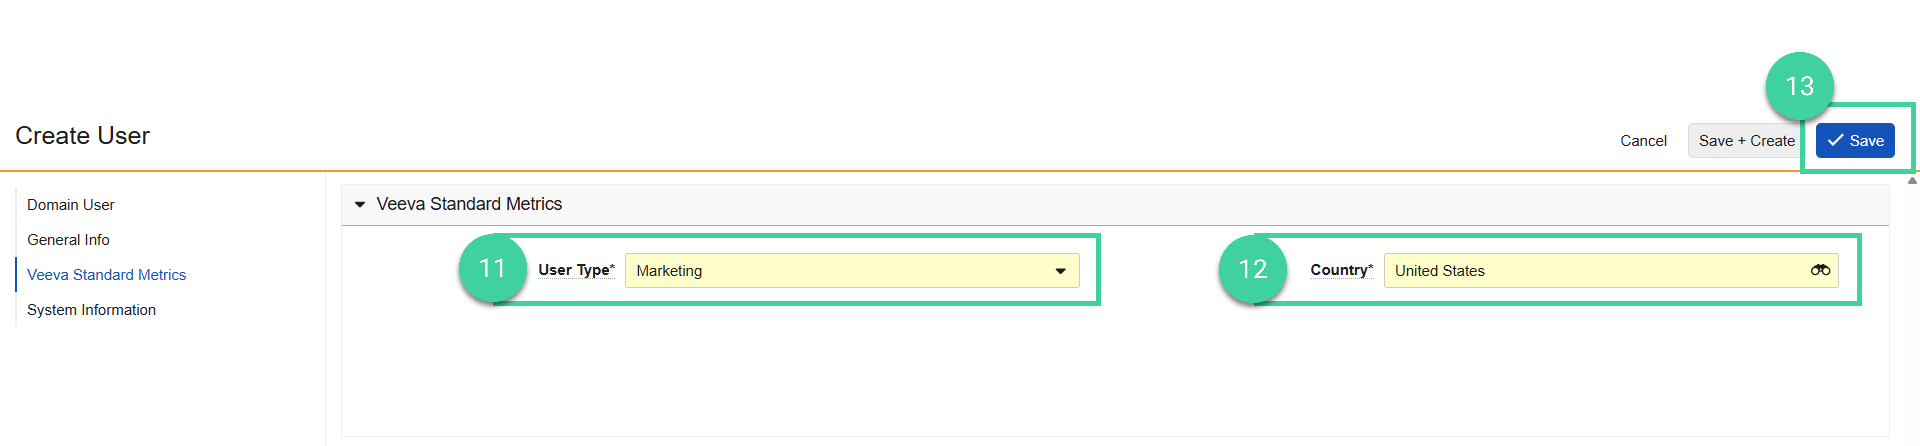
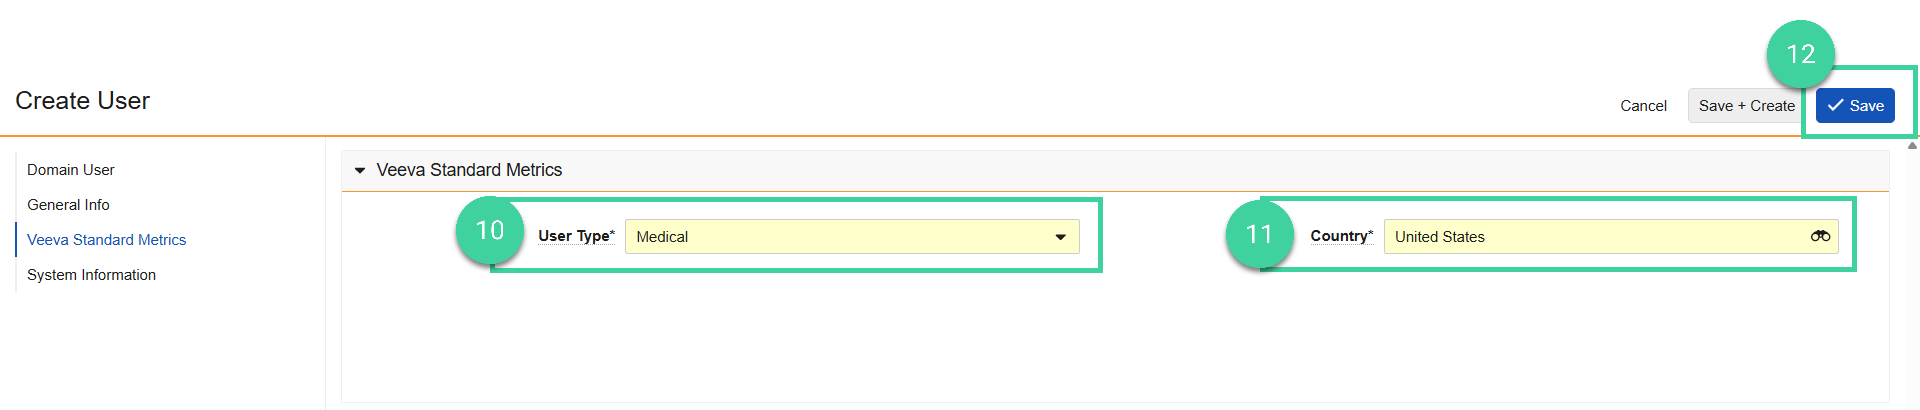
Select the applicable User Type. User type does not control any permissions or access in the system, but is used to collect telemetry information about usage to guide the Veeva Basics team on best practices.
Select the user’s Country.
Click Save. New users are active immediately unless you select a later activation date.
Add an Existing Domain User
If a user already exists in one of your other Vaults, such as Clinical Basics or RIM Basics, you should add them as an existing domain user to your Vault.
To create a domain user for an existing user on another Vault in the same domain:
Navigate to Admin > Users & Groups and click Create.
Start typing the domain user name you want to add and select it from the dropdown.

The user’s First Name, Last Name, User Name, and Email will automatically populate. You can change the First Name or Last Name if desired.
Optional: Enter the user’s Title and/or Mobile phone number.
Optional: Change Language, Locale, and Timezone.
Select the user’s Security Profile.
Select a Security Policy. Vault requires all new users not using SSO (Single Sign-On) to update their password the first time they log in. If your organization uses SSO, select SSO in the dropdown and enter the user’s Federated ID to associate the user record with the user ID used for SSO.
Select the Activation Date if you want the account to become active at a later date, otherwise click Today or leave the date blank to activate the user today.
Ensure that Send Welcome Email on Activation Date is checked if you want the user to receive a welcome email.
Select the applicable User Type. User type does not control any permissions or access in the system, but is used to collect telemetry information about usage to guide the Veeva Basics team on best practices.
Select the user’s Country.
Click Save. New users are active immediately unless you select a later activation date.
Cross Domain Users
Cross domain users can log in to any Vault they have access to using their existing home domain login credentials or using SSO if it is enabled for your organization.
Best Practice
If you are using cross domain users for the purpose of linking a user’s production user with their sandbox user, first create the user in your production environment. Then create the user as a cross domain user in your sandbox environment.
To create a cross domain user:
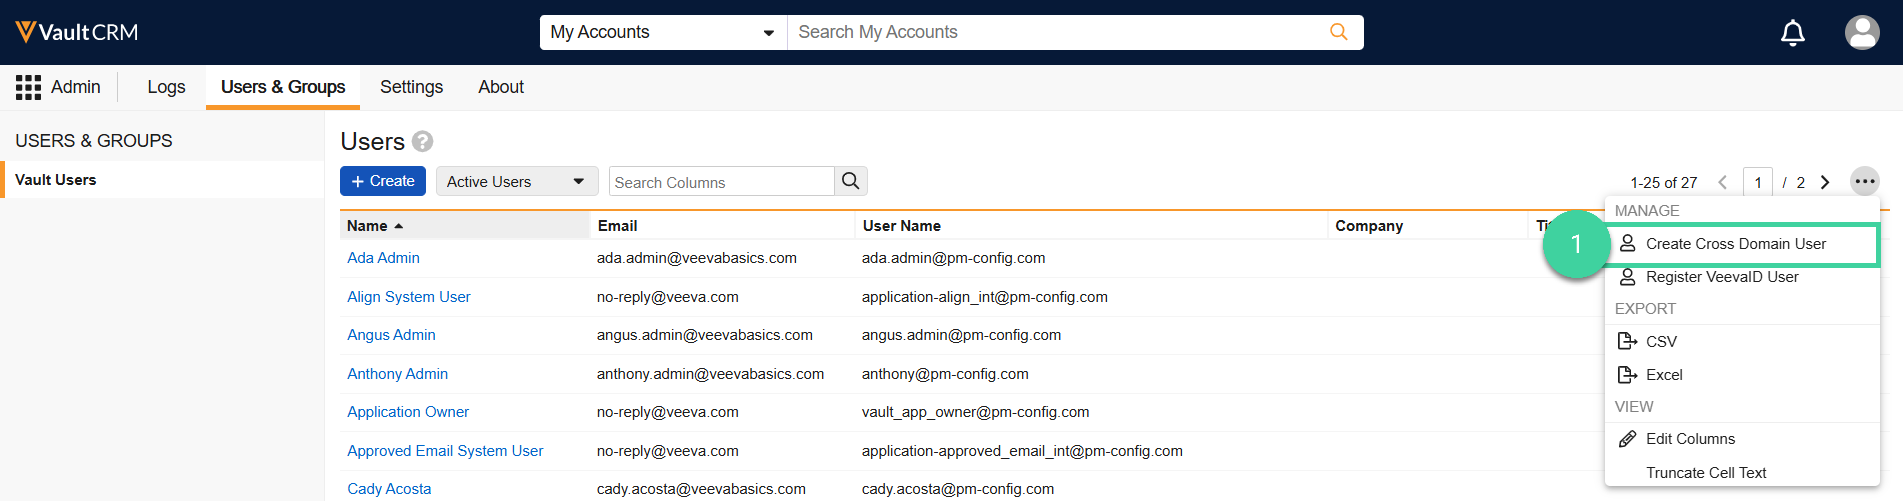
Navigate to Admin > Users & Groups and select Create Cross Domain User from the All Actions menu.
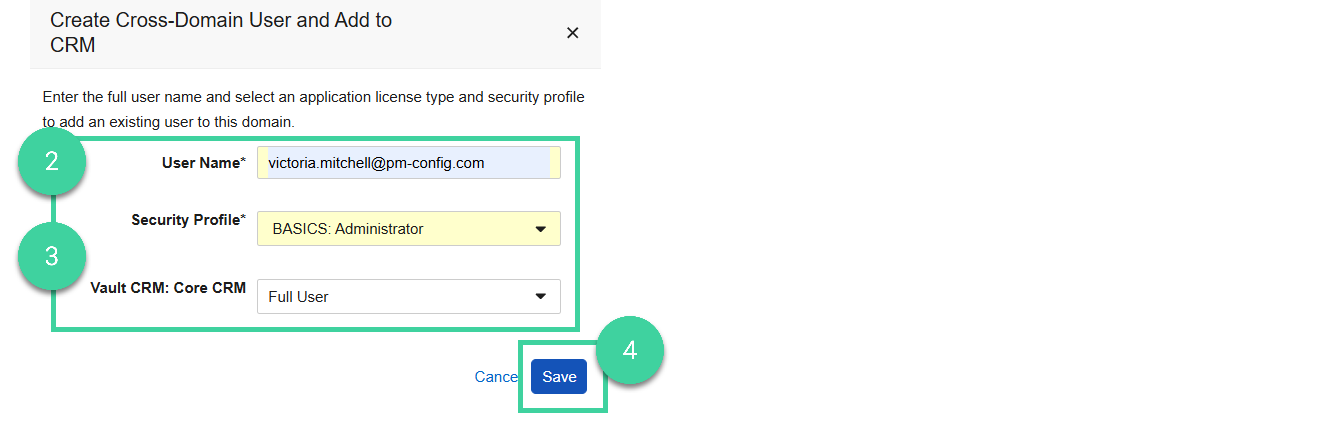
Enter the full User Name of the existing user.
Select a Security Profile and ensure that Vault CRM: Core CRM is set to Full User.
Click Save to save the cross domain user information. Vault automatically populates the remaining required profile fields based on the existing user information from the home domain.
Edit the user to populate any optional fields and/or to add applicable security profile, user type, and country.
VeevaID Users
To register a VeevaID User:
- Navigate to Admin > Users & Groups and select Register VeevaID User from the All Actions menu.
- Enter the user’s email address and click Search.
- Click Invite User to VeevaID.
- Enter the user’s details.
- Click Send Invite. Vault sends an email to the user to complete the registration process. You will receive an email notification when the user has completed their registration.
Edit a User
Warning
When you update information for cross domain users, Vault syncs the changes across domains.
Note
You can update the User Name field, but you cannot edit the domain to which the user belongs.
To edit a user:
- Open the user record and click Edit ()
- Make the desired changes and click Save.
Inactivate/Reactivate a User
If a user leaves your organization and no longer needs to be active in the system, you can inactivate the user.
Best Practice
See Offboard a User for other tasks you may need to do when a user leaves your organization.
- Open the user record and select Make User Inactive from the Workflow menu.
- Click Yes to confirm.
- To reactivate a user, select Make User Active from the Workflow menu.
- Click Yes to confirm.