Create Stability Study
Last updated: Apr 17, 2026
Who can complete this task?
Veeva LIMS Basics: Stability Design & Study Admin
Create Study
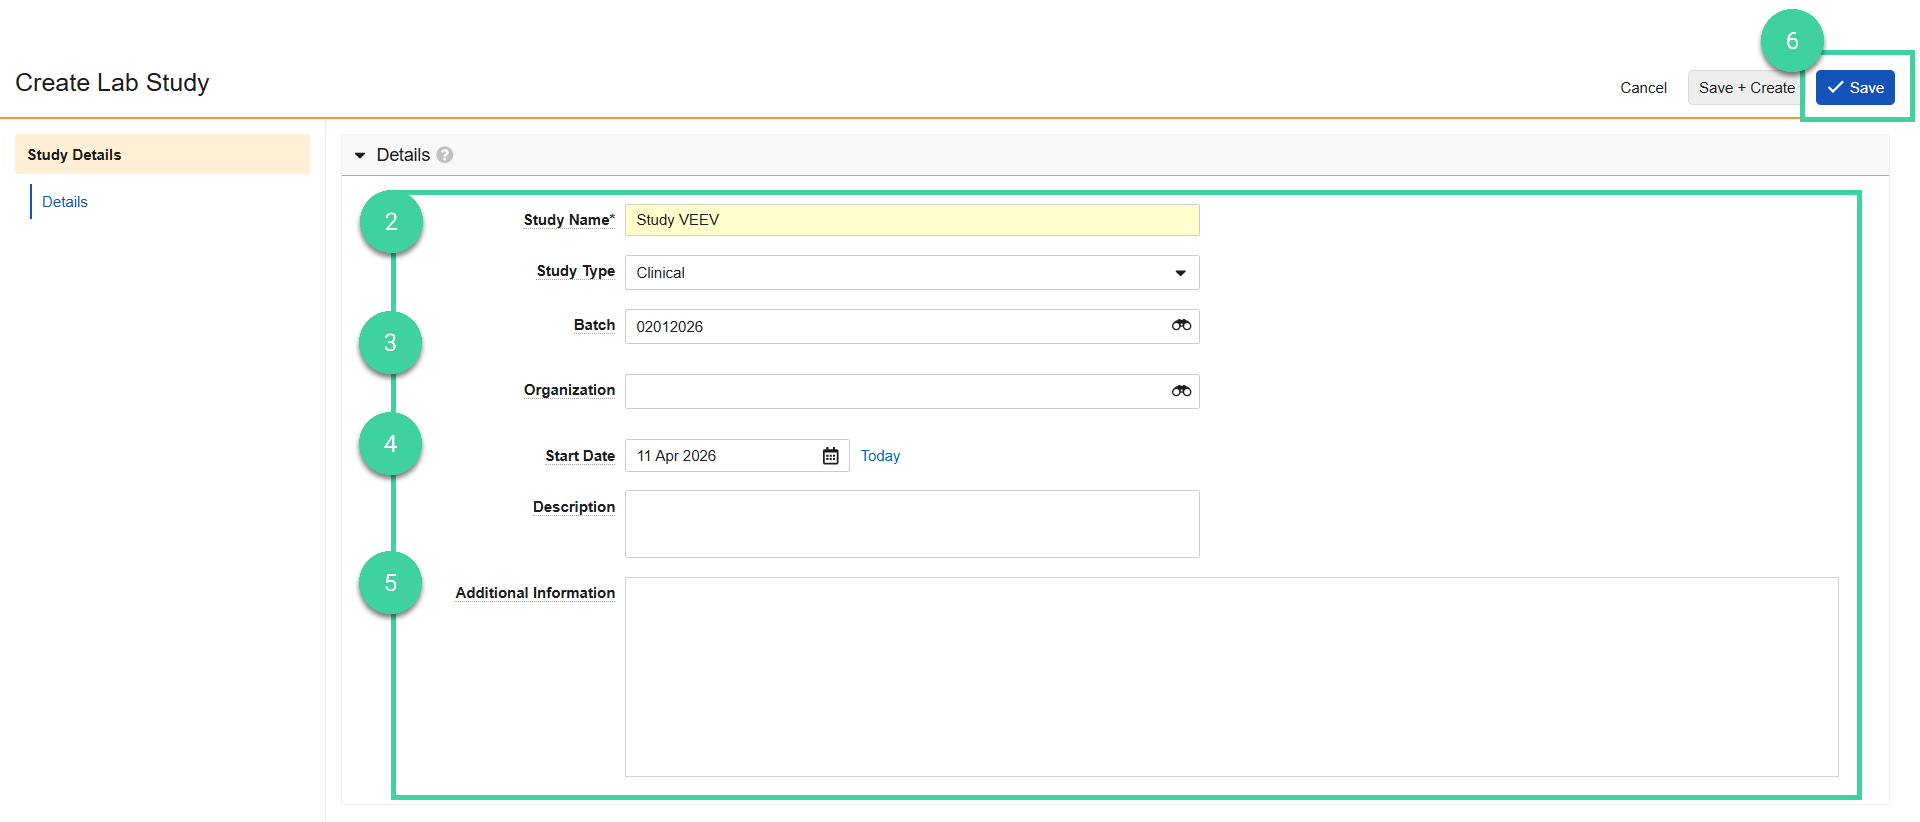
To create a stability study:
Navigate to Design & Admin > Stability > Stability Studies and click Create.

Enter the Study Name.
Optionally, enter the following:
- Study Type: Commercial, Clinical, or Experimental.
- Batch: The release batch for this stability study, if it was added in LIMS Basics. If specified, the results of this batch can optionally be used for the T0/Initial timepoint when the study is initiated.
- Organization: The organization that is running the stability study.
Enter the Start Date for the study.
Optionally, enter a Description (for example, a summary of the conditions, timepoints, and the purpose of the study) and/or Additional Information.
Click Save.
Note
All fields in the Details section (if populated) will display on the Stability Report.
Add Timepoints
Use your study protocol to create the necessary timepoints.
To add timepoints to a stability study:
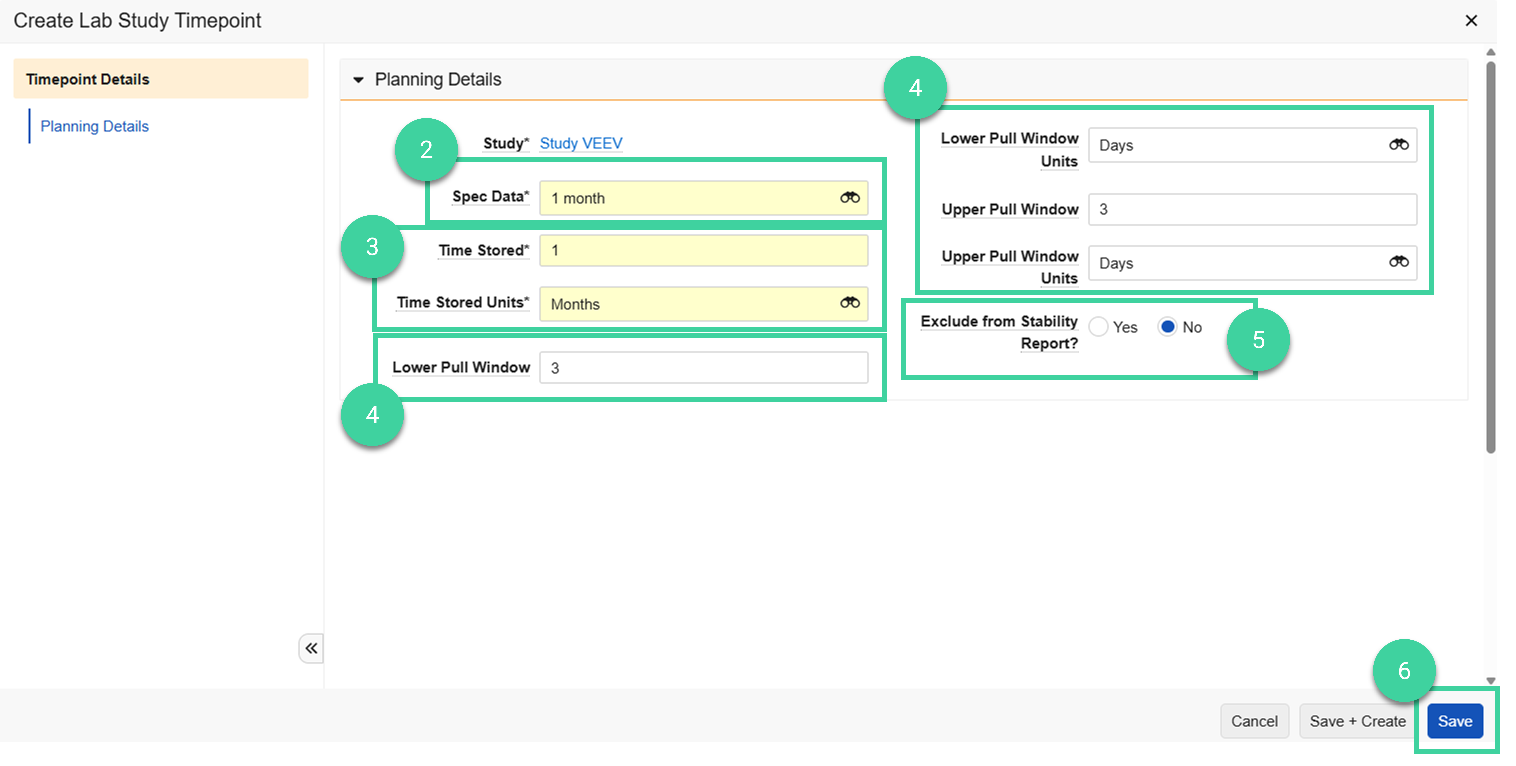
Expand the Timepoints section and click Create.

Select the Spec Data record that will be used to initiate the timepoint.
Note The T0 spec data can be either a release spec data or stability spec data.Enter the Time Stored/Time Stored Units to indicate the length of time the samples will be stored.
Note If you enter 0 as the time stored, some fields are hidden because they are not relevant for that timepoint.If samples can be pulled early or late (for example, to accommodate holidays or weekends), you can optionally add the lower and/or upper pull windows:
- Lower Pull Window/Lower Pull Window Units
- Upper Pull Window/Upper Pull Window Units
Note Pull windows are only applicable to non-T0 timepoints.If the timepoint’s spec execution result data should not be included in the export file or Stability Report, populate Exclude from Stability Report? as Yes.
Click Save.
Visual Study Overview
Use the visual study overview to review your timepoints against your protocol.
To visually review the study:
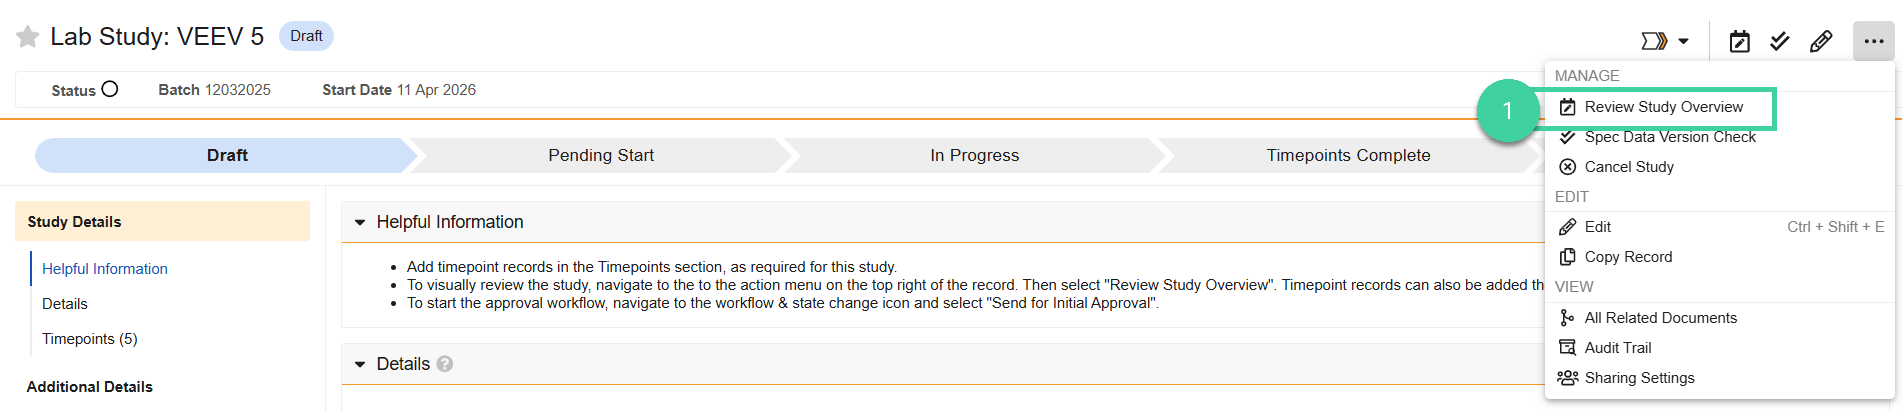
Select Review Study Overview from the All Actions menu to visually review the tests to be performed for each timepoint by storage condition and/or orientation.
Use the filters to confirm that the correct tests are selected for each storage condition and orientation at each timepoint.
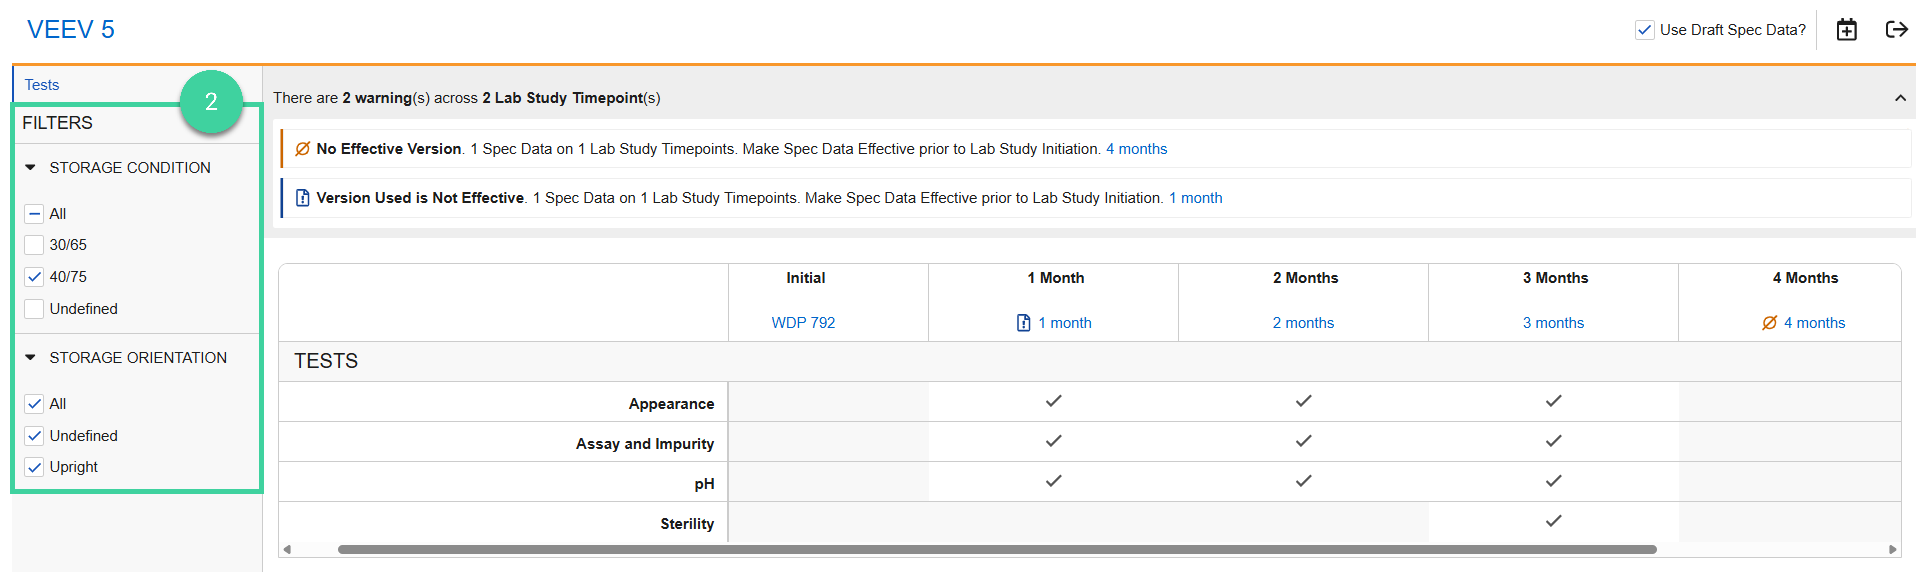
Click the spec data link for each timepoint to review the samples, tests, and specification criteria details for the timepoint.
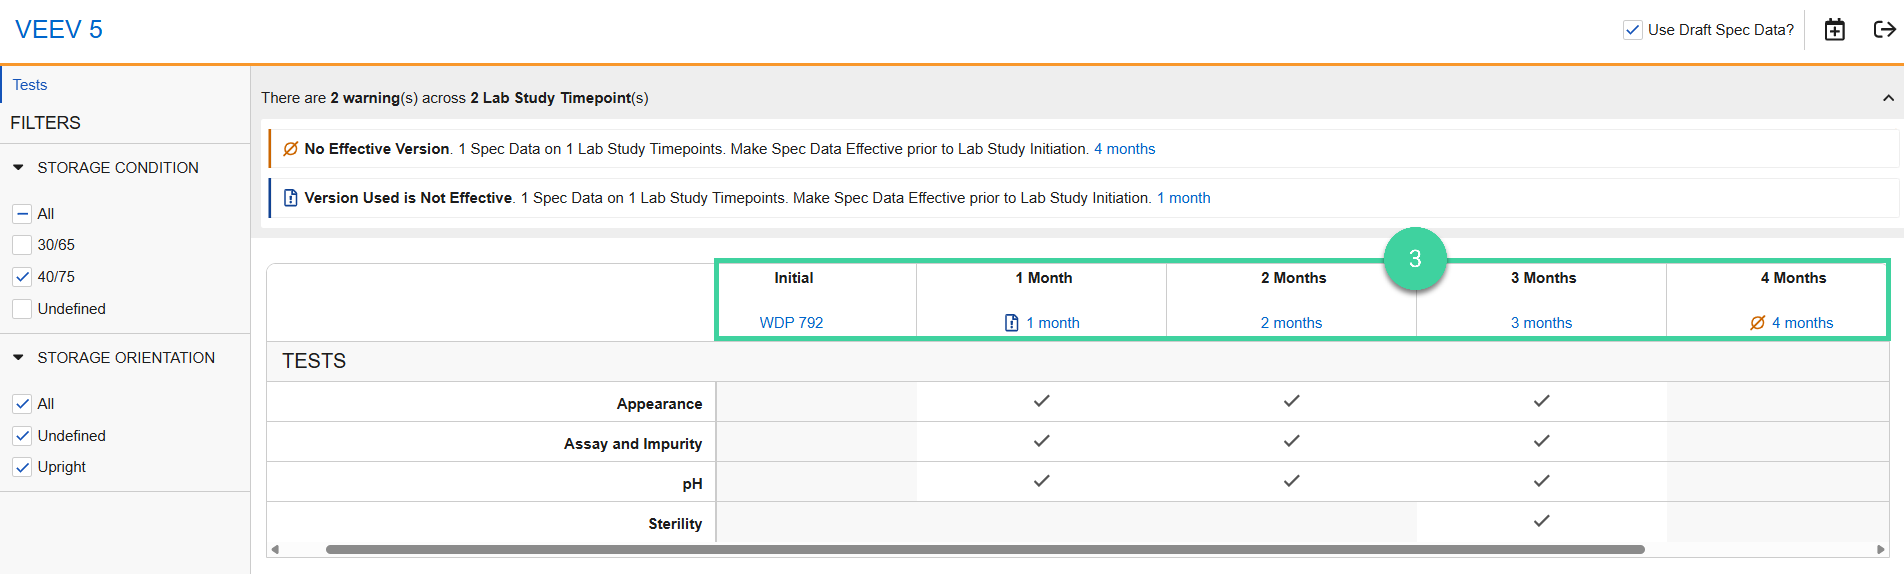
Possible Spec Data Warnings
No Effective Version: No Effective version of the spec data exists. You will need to make the identified spec data(s) Effective prior to sending the study for initial approval.
Newer Non Effective Version Available: A newer non-Effective version of the spec data is available. If the newer version is made Effective, the values may change.
Check the Use Draft Spec Data? box to reflect the non-Effective spec data in the visual study overview instead of the Effective version.
Note If Use Draft Spec Data? is checked, the warning message changes to Version Used is Not Effective to indicate the visual study overview is reflecting the non-Effective spec data version.
If you want to use the non-Effective version in your stabilty study, it needs to be made Effective prior to sending the study for initial approval.Version Used is Not Effective: The spec data version reflected in the visual study overview is not Effective, but an Effective version is available. If you want to use the non-Effective version of the spec data for the stability study, make it Effective prior to sending the study for initial approval.
Uncheck the Use Draft Spec Data? box to reflect the Effective spec data the visual study overview instead of the non-Effective version.
Note If Use Draft Spec Data? is unchecked, the warning message changes to Newer Non Effective Version Available.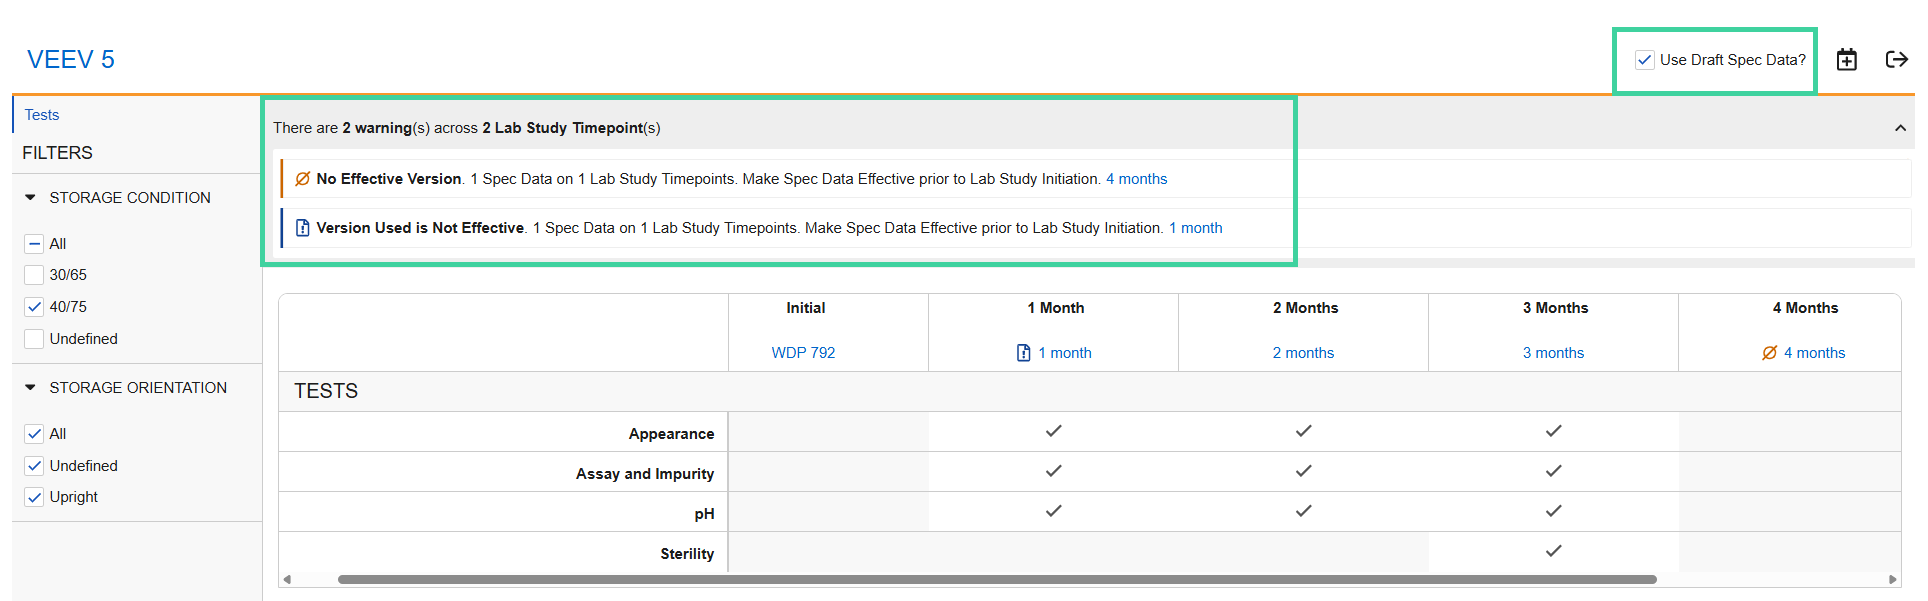
- When you are finished with your review, click the Exit Overview icon ().
Copy Study
If you want to create a new stability study that is similar to one you have already created, you can copy a study to create a new one.
To do this:
Navigate to Design & Admin > Stability > Studies and select Copy Record from the All Actions menu for the study you want to copy.
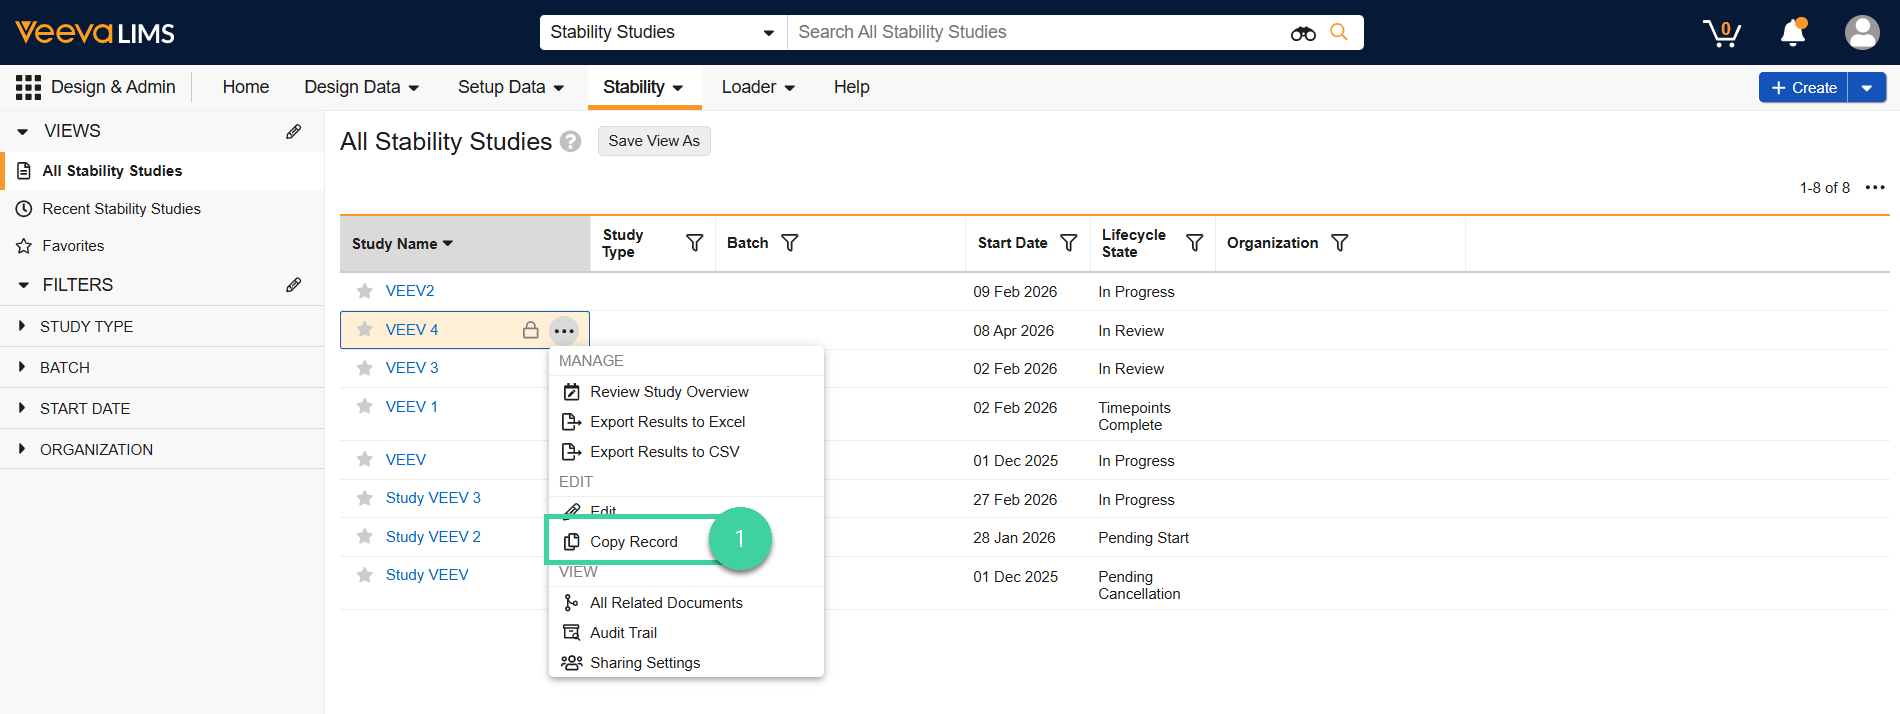
Update the Study Name, populate any optional study details, and click Save.

Check the Copy Related Records box to include the related timepoint records in the study copy.
Click Save. You will receive a notification when the copy is complete.

Note
After a stability study is created, the next step is to send it for initial study approval.