Enter Test Results
Last updated: Apr 17, 2026
Who can complete this task?
Veeva LIMS Basics: Results Entry
In LIMS, there are two types of testing that you may enter results for:
In Release Testing, once the Batch Creator has created the batch and the results have come back from the external testing laboratory, the next step is for the Results Entry user to enter those results into the system.
In Stability Testing, results are entered after the study has received initial approval, the Stability Design & Study Admin has initiated the study, and the results have come back for a study timepoint.
Entering the sample results is largely the same for release and stability testing.
To enter test results:
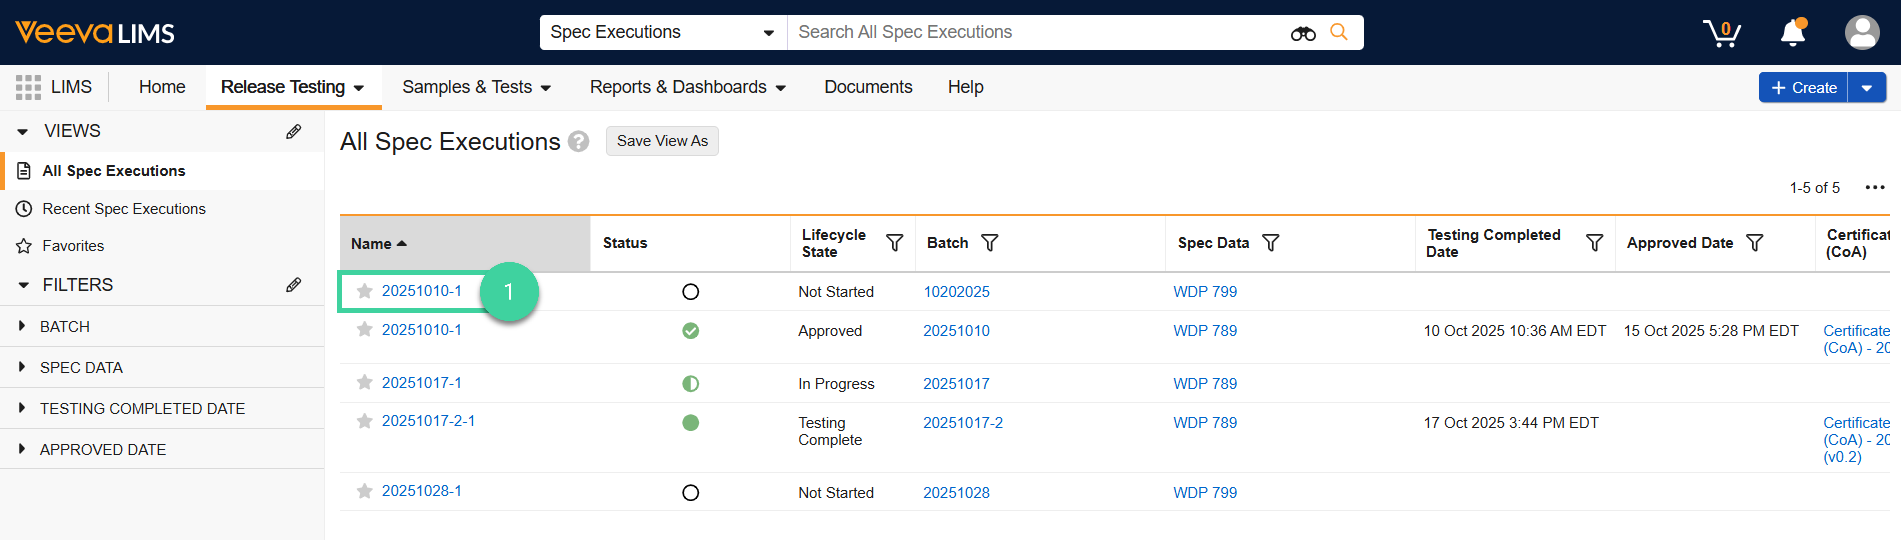
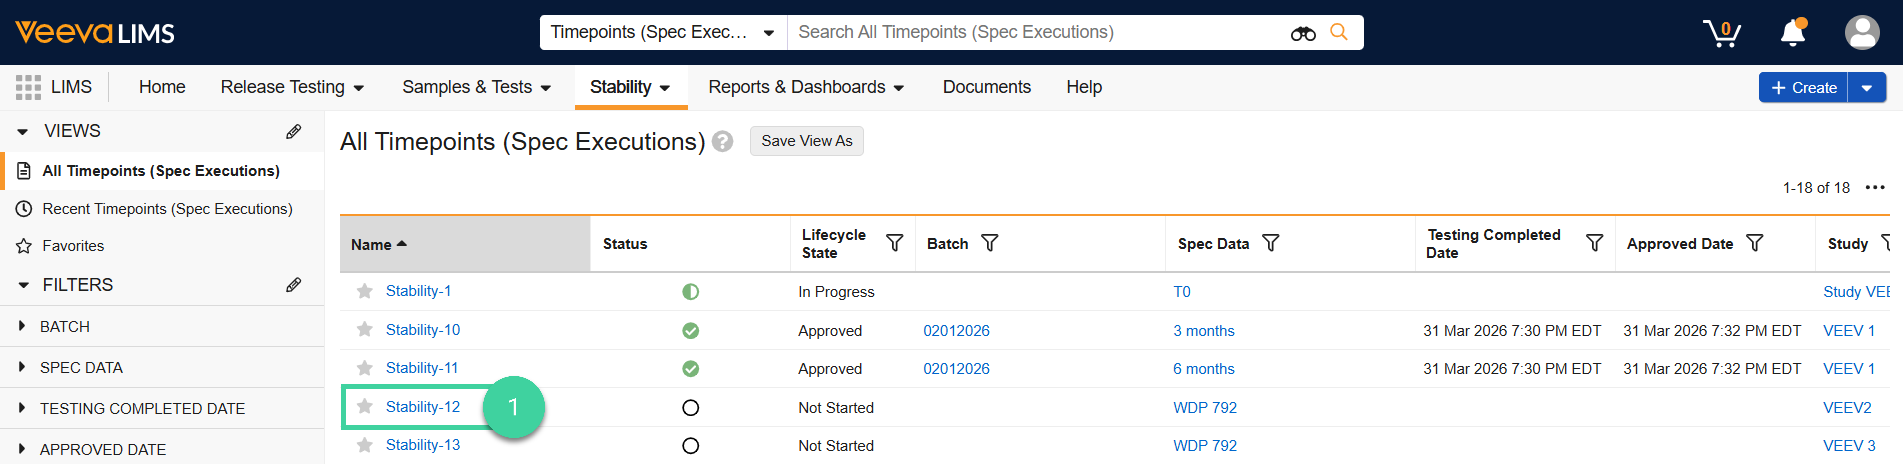
- Open the spec execution record:
For release testing, navigate to LIMS > Release Testing > Spec Executions and select the spec ex record to enter results for. Alternatively, if you just created the Batch, expand the Spec Execution section and click into the Spec Execution record.
For stability testing, navigate to LIMS > Stability > Timepoints (Spec Executions) and select the spec ex record to enter results for. Alternatively, from the study record, expand the Timepoints section and click into the Spec Execution record for the timepoint.
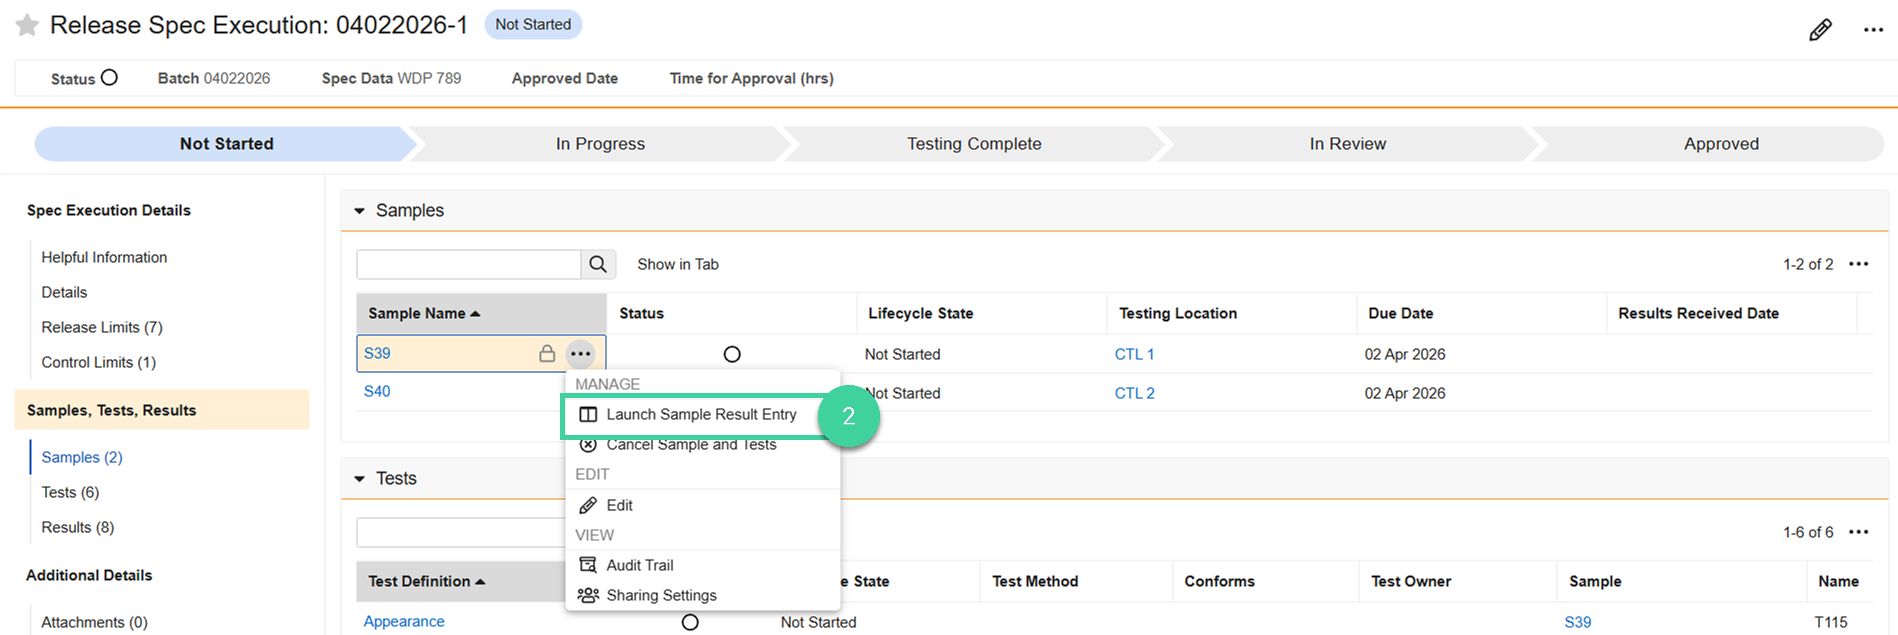
In the Samples section, hover over a sample name and select Launch Sample Result Entry.
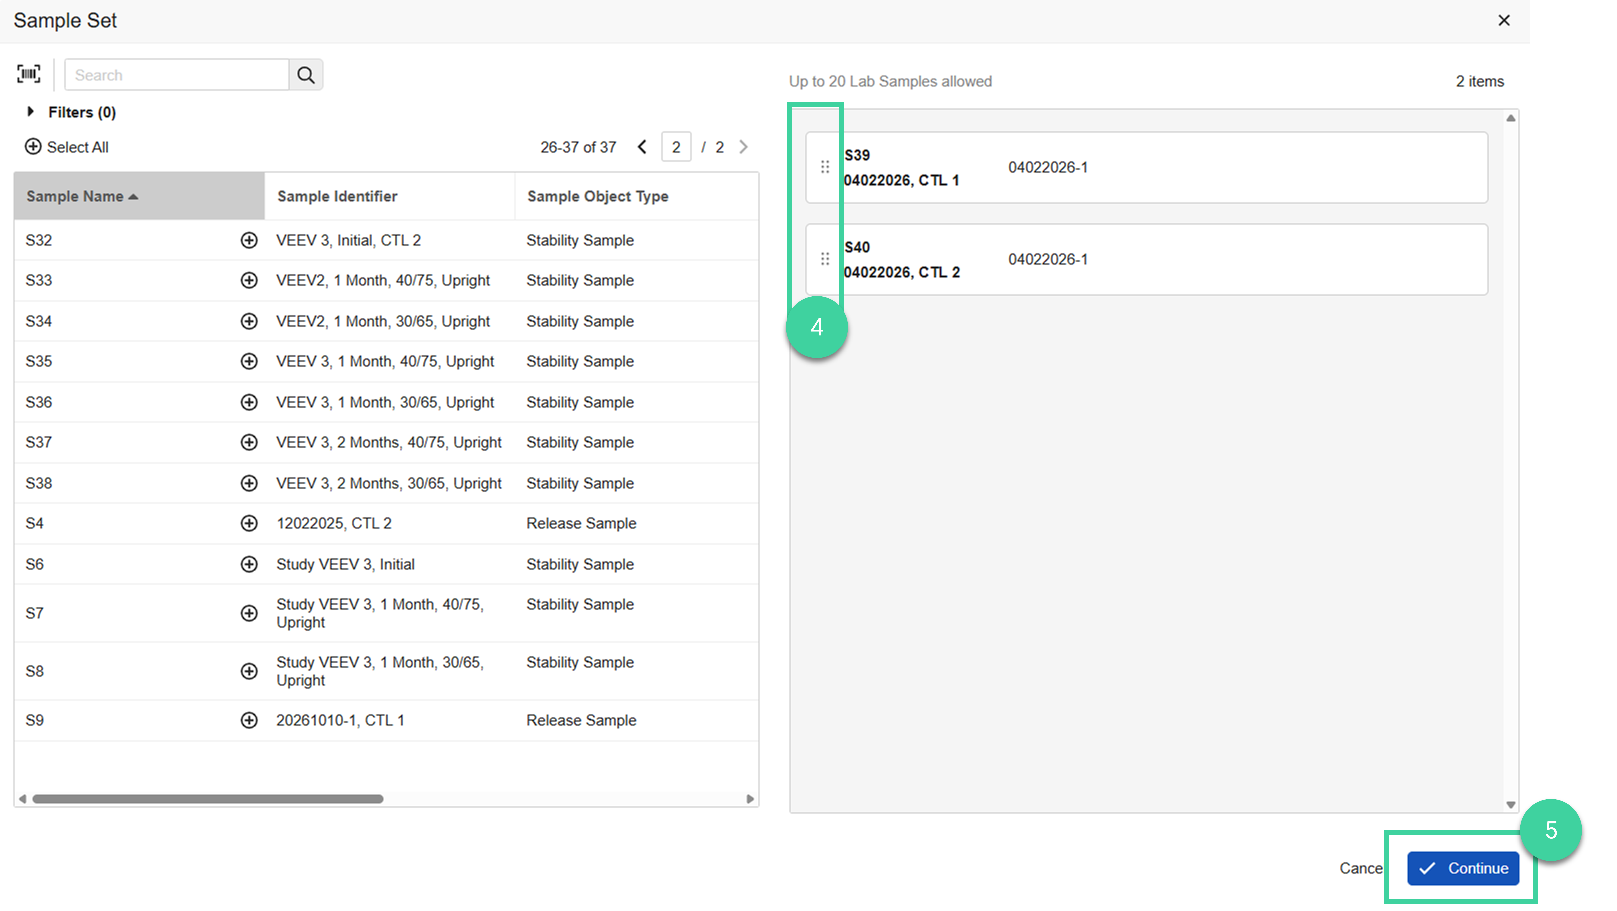
Optionally, click the plus icon () to add additional samples. You can add up to 20 samples.
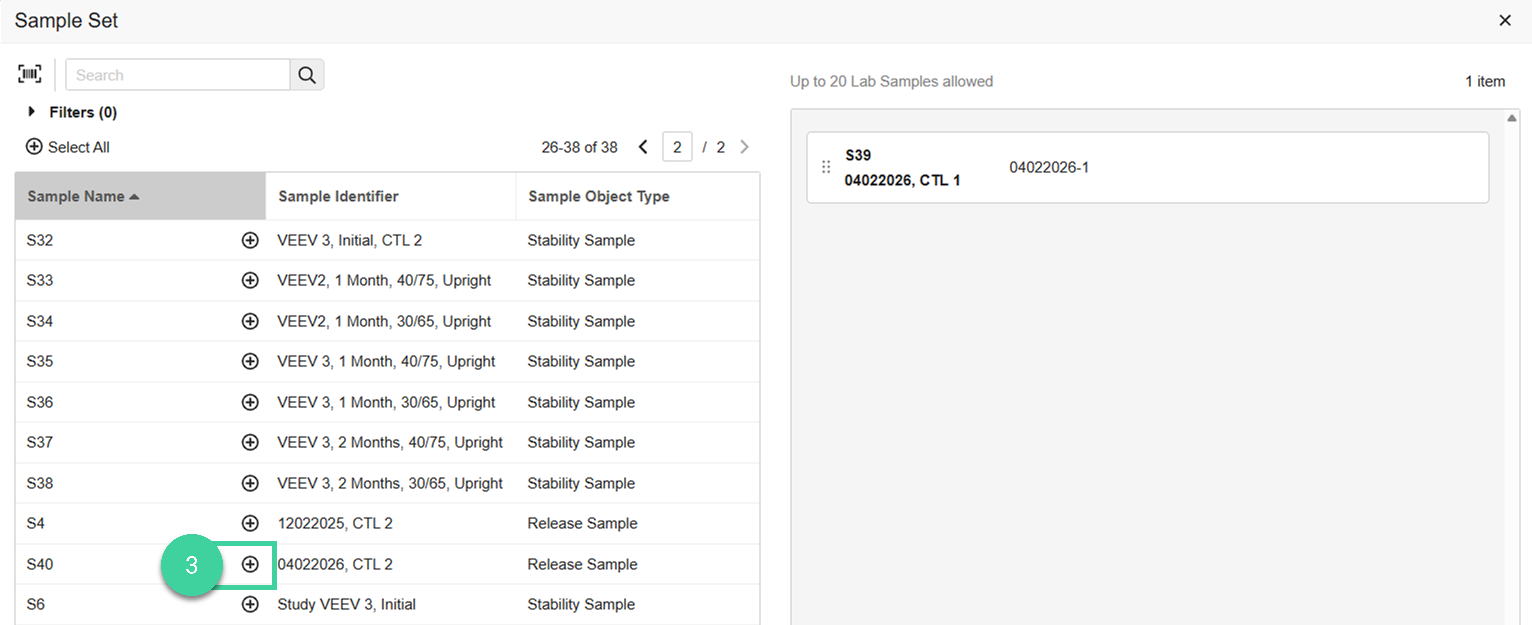 Note Use the Sample Identifier column to help locate your samples.
Optionally, drag and drop the samples in the order you want to display them in.
Click Continue.
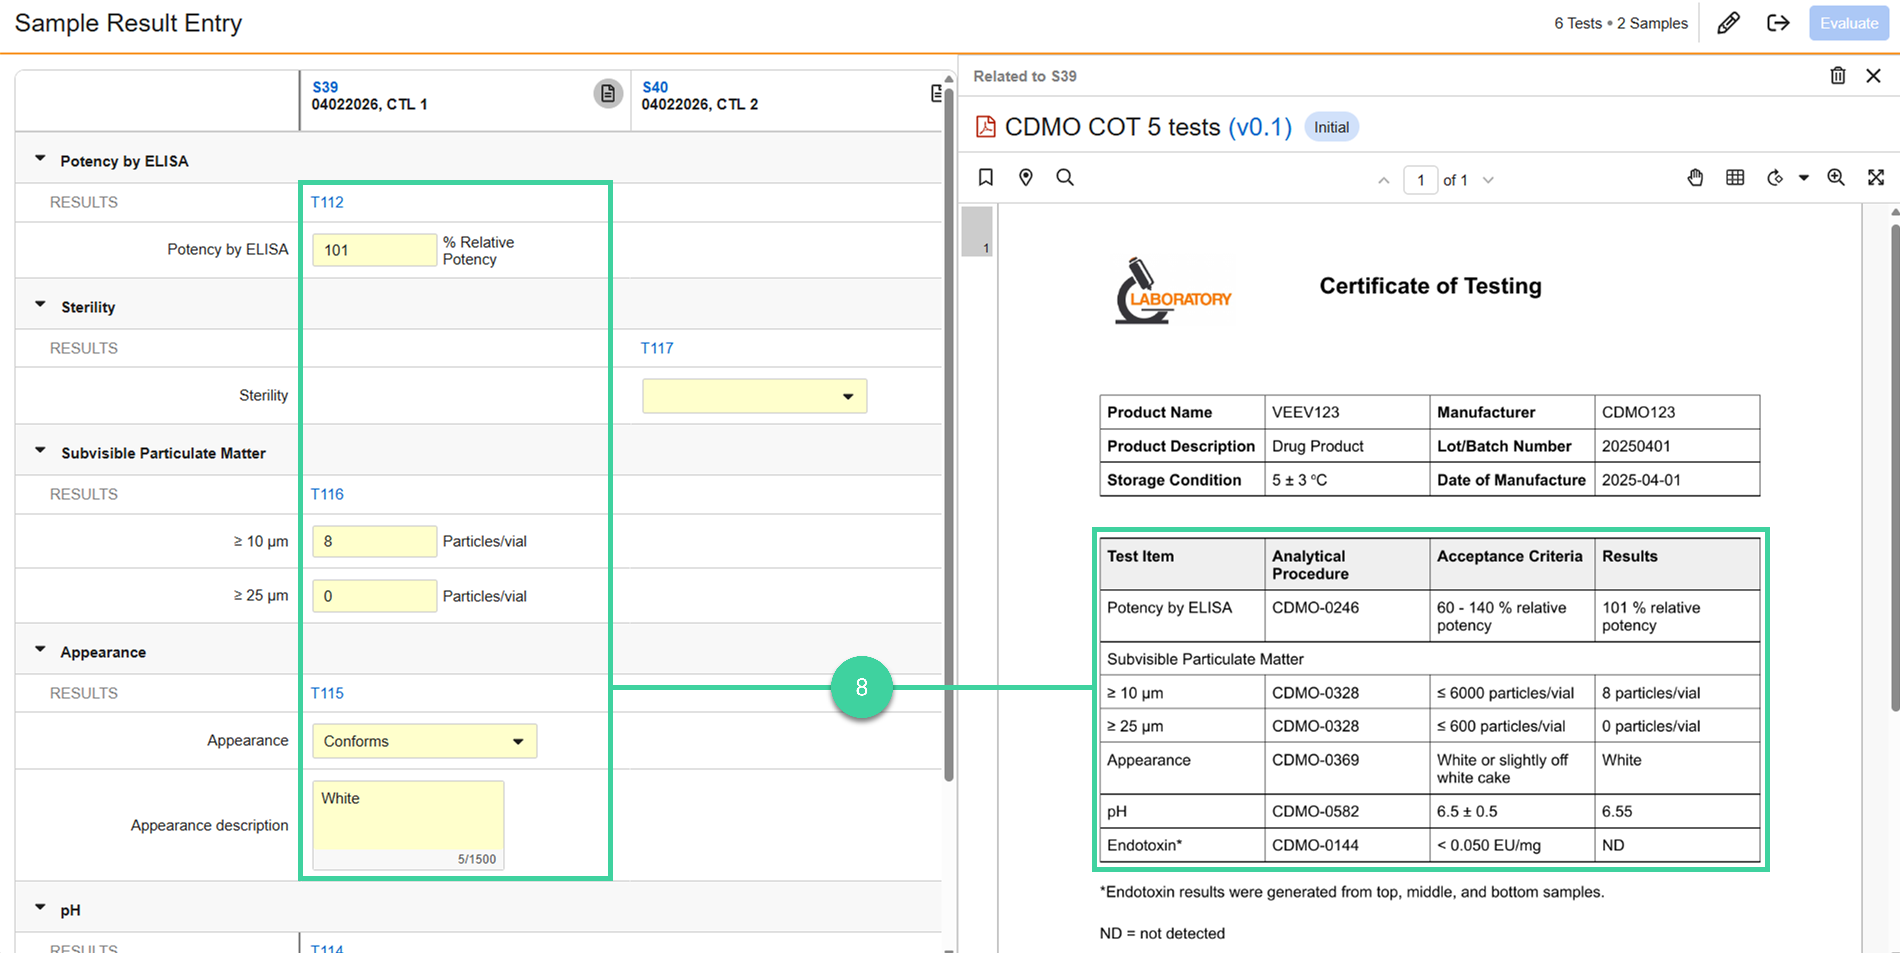
To make transcribing results easy, you can upload the results you received as a document (e.g., a certificate of testing (CoT). For each sample, click the upload icon () and select the results that correspond to that sample. Or you can click the binoculars icon () to search your Vault library for a results document that has already been uploaded.

Click the document icon () to open the results for that sample.

Transcribe the results from the document into the sample result entry pane. Vault will automatically save your entries as you go.
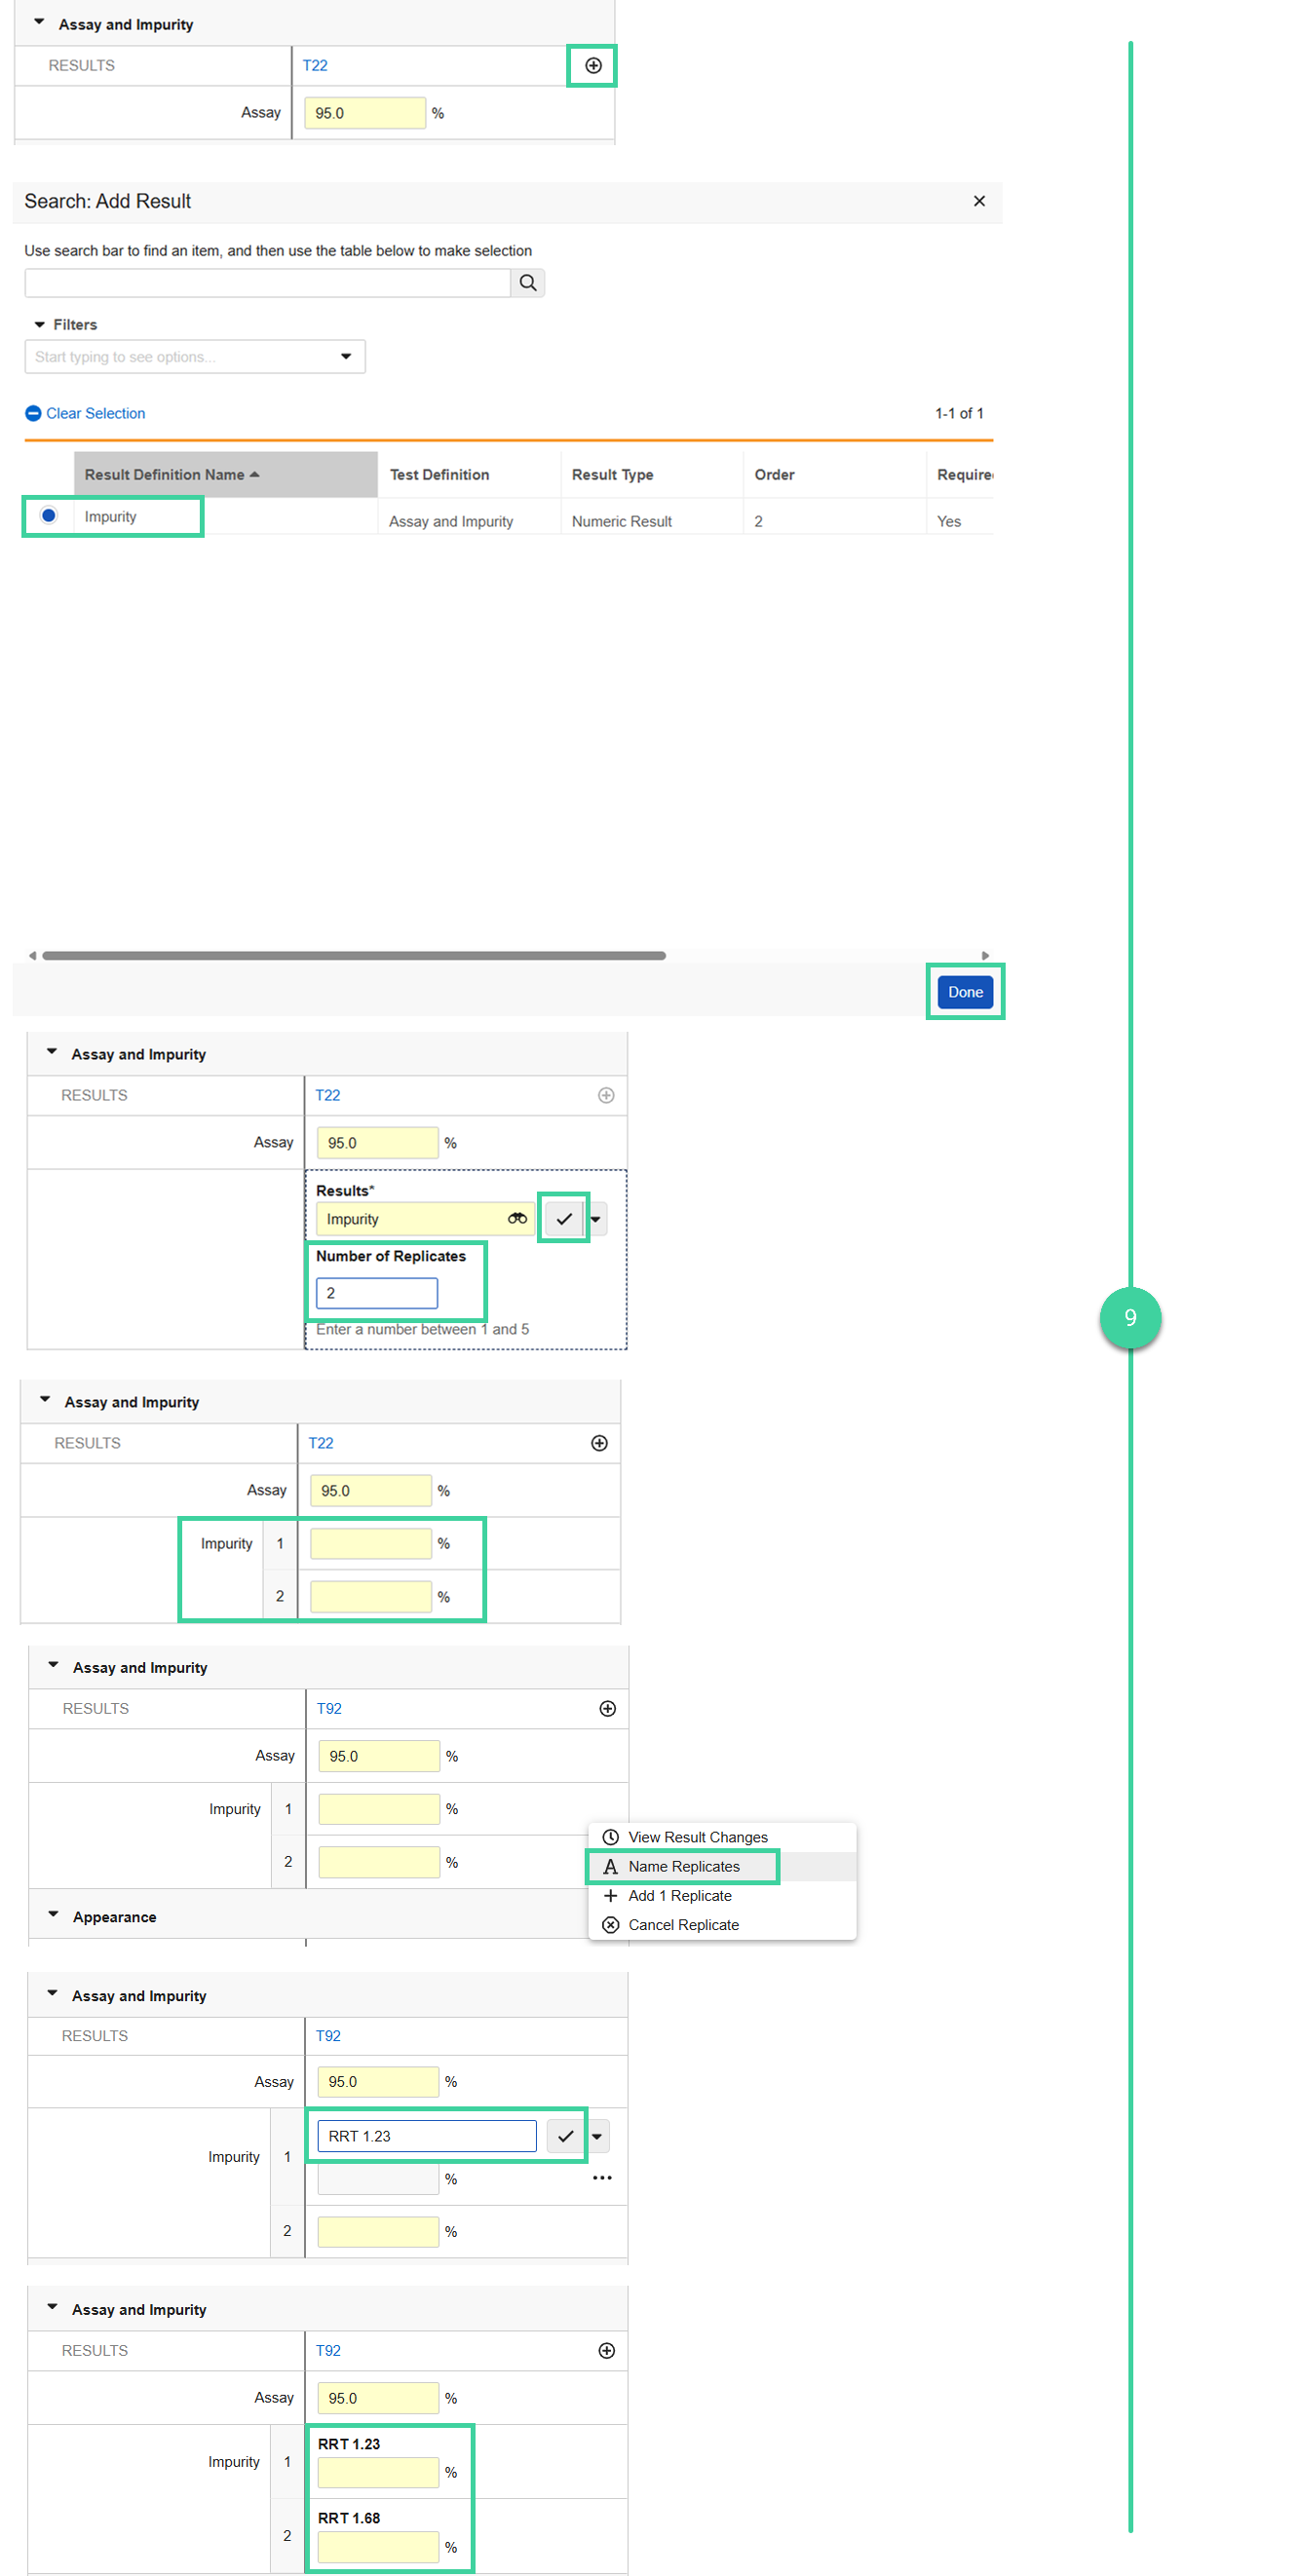
If applicable, enter replicate results. Replicates allow for the dynamic capture of results to accommodate unknown impurities.
If the test definition specifies a certain number of replicates to be immediately available, enter the results in the provided fields.

If the test definition instead allows the Results Entry user to enter replicate results on an ad hoc basis, click the plus icon (), select the result definition, and click Done. Enter the Number of Replicates (1-5) and click the check icon () to save. Select Name Replicates from the All Actions menu for each replicate to provide a name and click the check icon () to save. Then enter the results in the provided fields.
If necessary, you can make changes to a result by clicking into the field and updating the result. Vault keeps track of all changes.
Note Hover your mouse over a result and select View Result Changes to see the history of all changes to that result.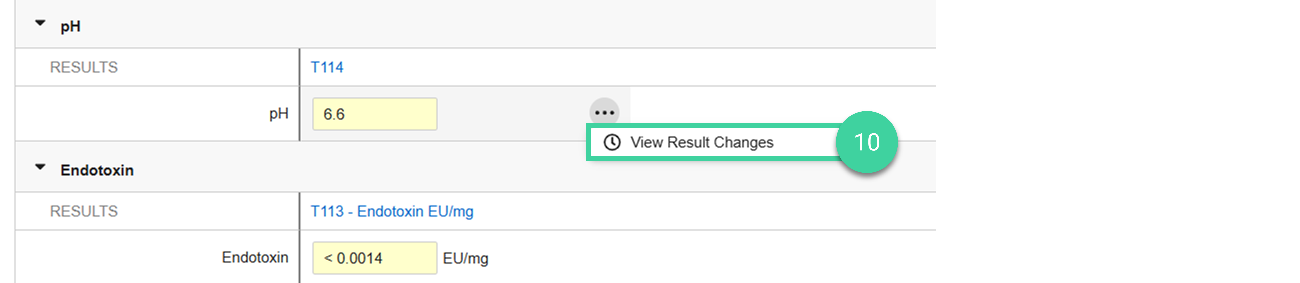
When all required results for all samples are filled out, click Evaluate. This commits all the values to the database and evaluates against the limits.

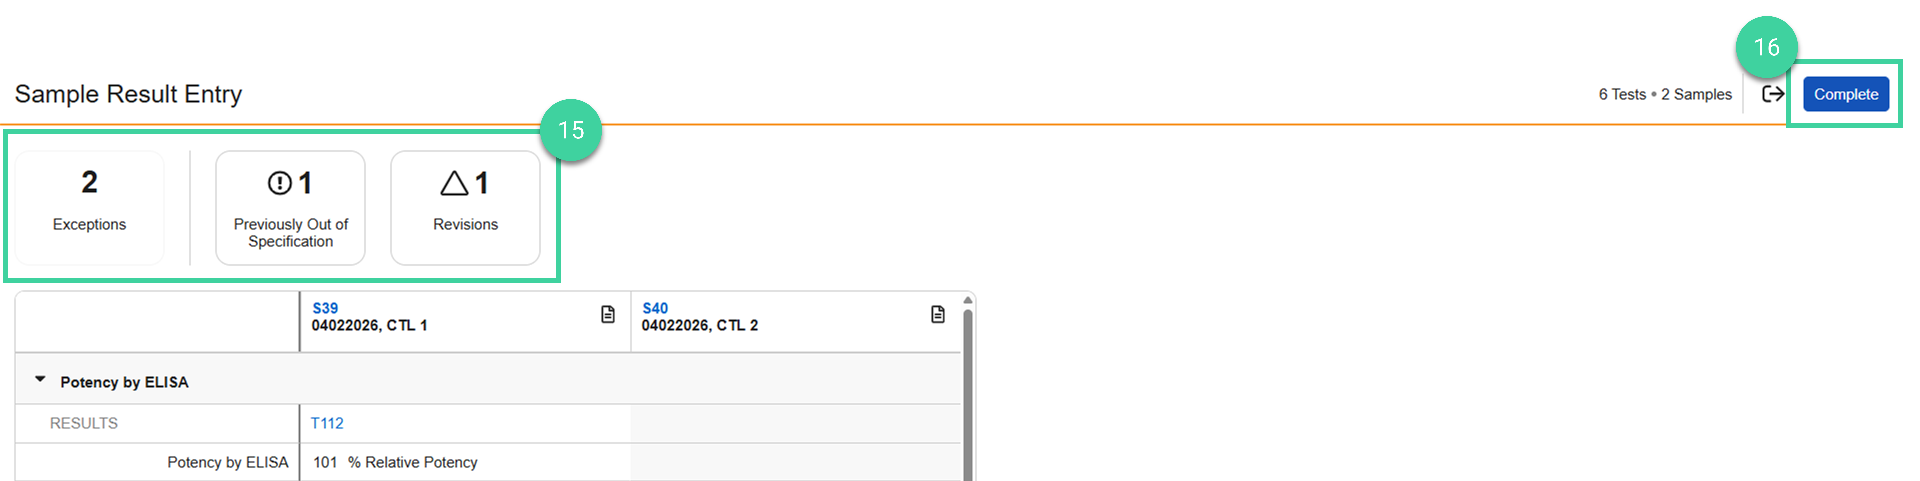
View out of specification and alert warnings and correct any entries if necessary.
- indicates the result is out of specification.
- indicates the result is out of the alert limit.
If necessary, you can make changes to a result. Vault keeps track of all changes. Hover your mouse over the result and click Edit (). Update the result and click Save (). Provide a Change Reason, optionally Change Comments, provide your e-signature and click Complete.
- indicates the result was previously out of specification.
- indicates the result was changed after it was evaluated.
Click Verify.

If there are any exceptions, they will be summarized at the top. Click to see those results.
When the results look accurate, click Complete.
When result entry has been completed for all samples, the spec ex, and associated sample and test records, change to Testing Complete. For release testing, a draft Certificate of Analysis is automatically generated.
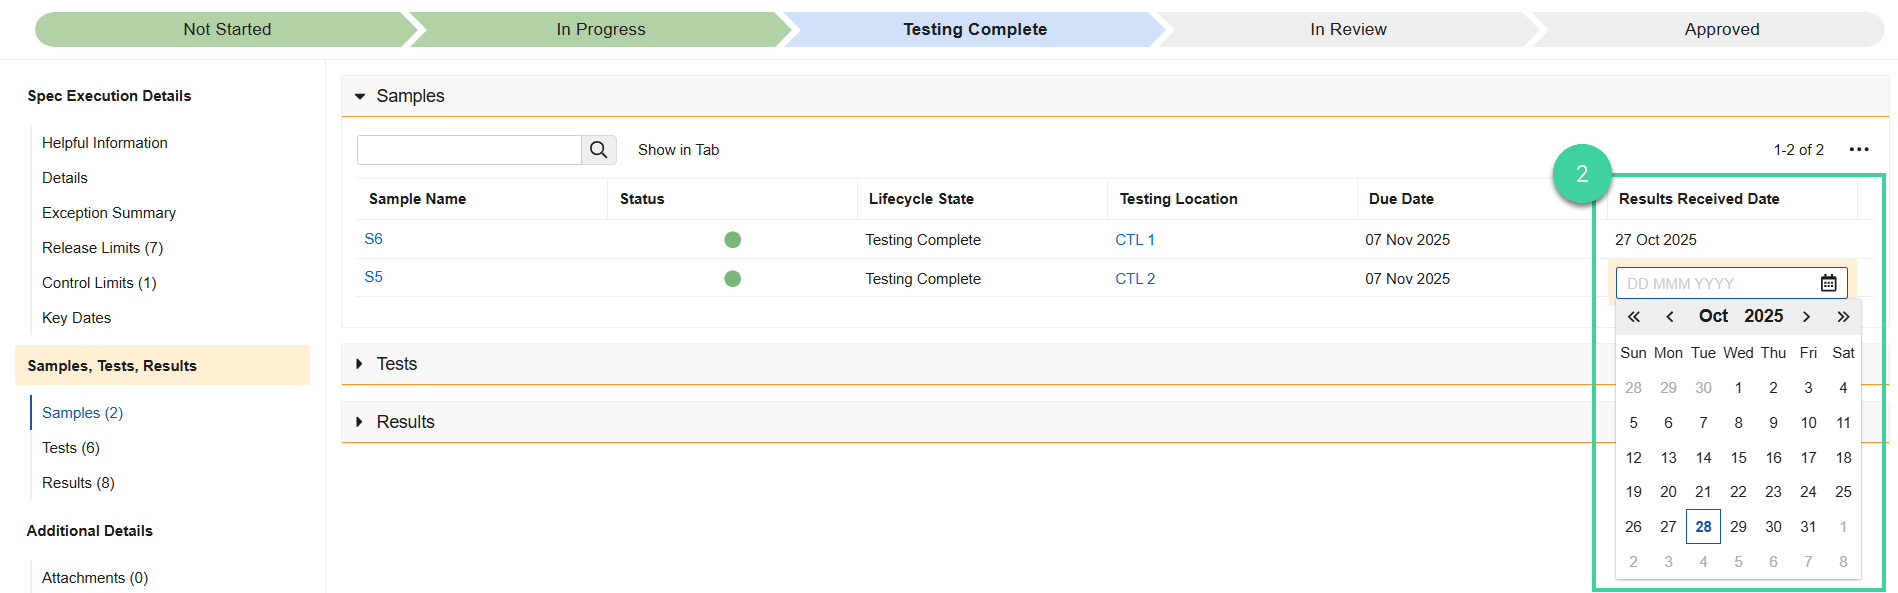
Record Results Received Date
If you want to track when you received the results, you can enter the date per sample in the results received date column.
To record the results received date:
From the spec execution record, open the Samples section.
For each sample record, click into the Results Received Date column, enter the date you received the results, and click out of the field.
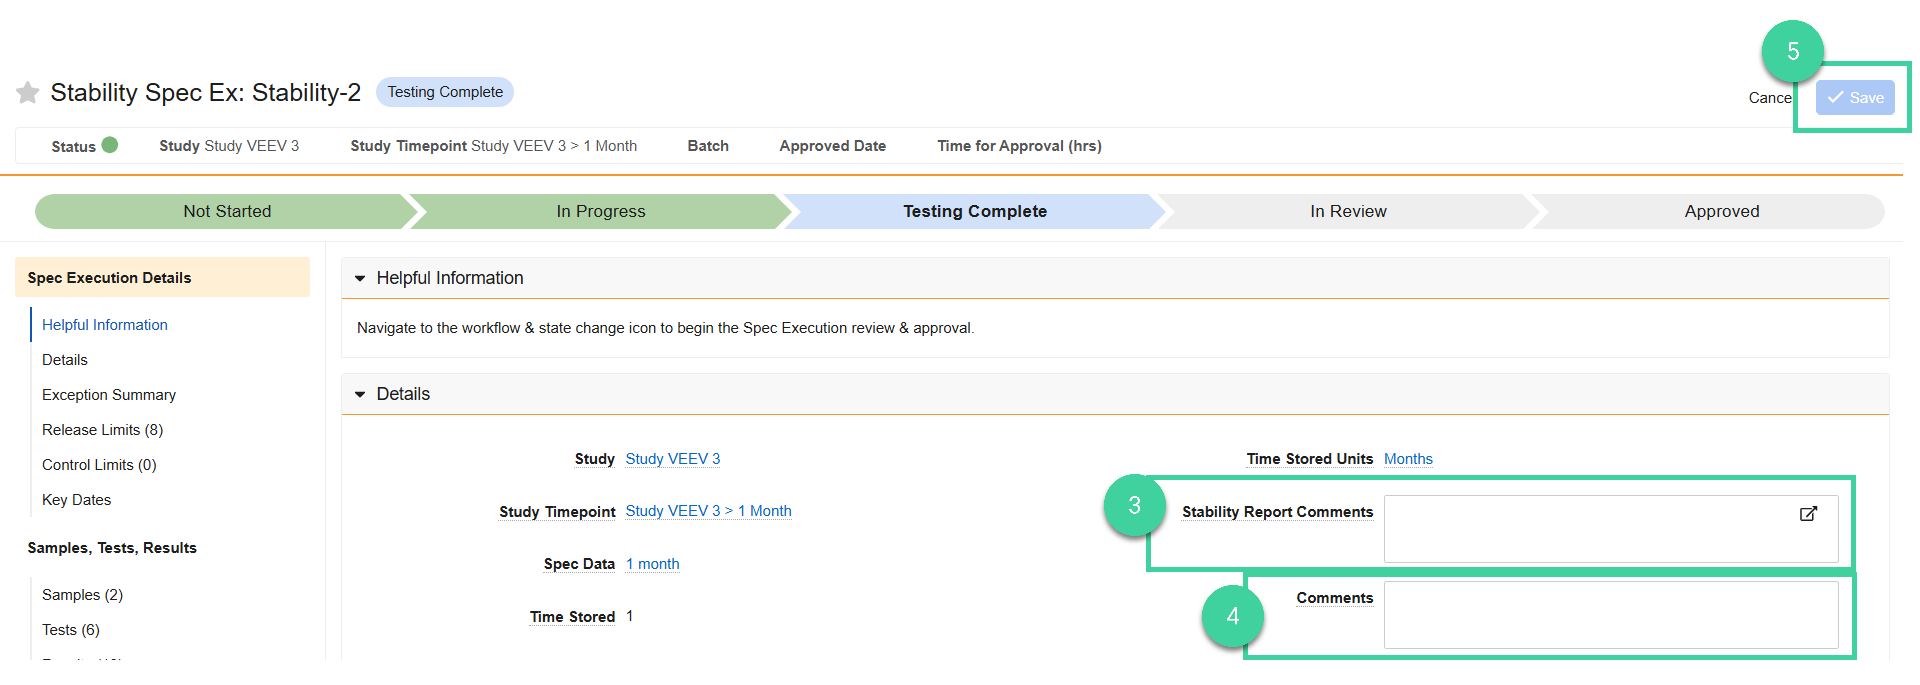
Add Comments
You can optionally edit the spec execution record and add one or both types of comments:
- CoA Comment (release spec exes only) will print on the Certificate of Analysis. Spec Ex reviewers will also be able to add a comment.
- Stability Report Comments (stability spec exes only) will print on the Stability Report.
- Comments will not print on the Certificate of Analysis or Stability Report.
To add a comment:
From the spec execution record, click Edit ().
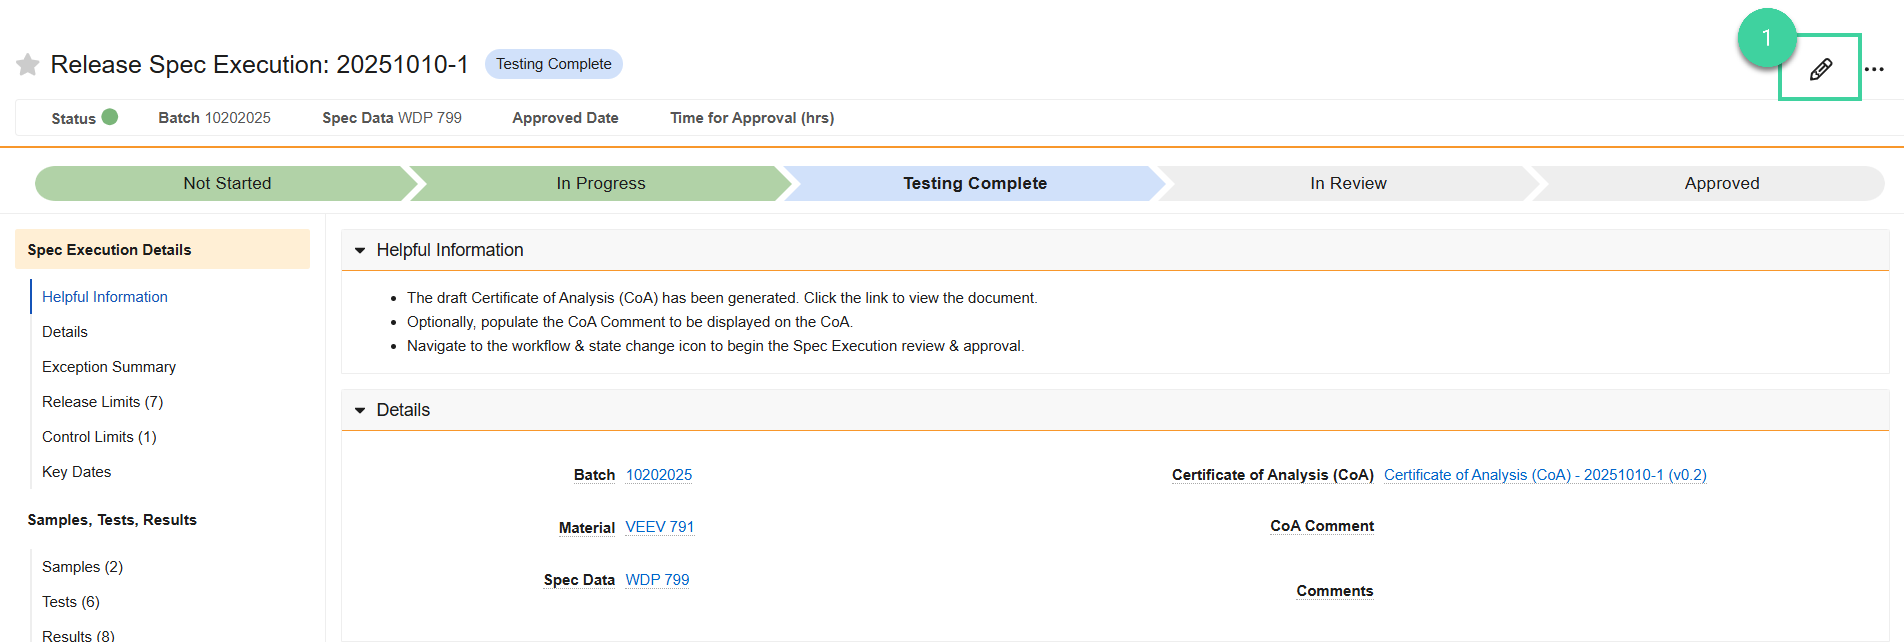
Open the Details section.
For release testing, in the CoA Comment field, enter the text to display on the CoA. For stability testing, in the Stability Report Comments field, enter the text to display on the Stability Report.
In the Comments field, enter text for comments you want to capture that will not display on the CoA or Stability Report.
Click Save.