These pages cover general tasks. For lifecycle-specific guides, visit the Quickstart Guides section in the app homepage.
Apply Overlay to a Protected PDF
Last updated: Apr 17, 2026
Who can complete this task?
Veeva Quality Basics: Vault Admin
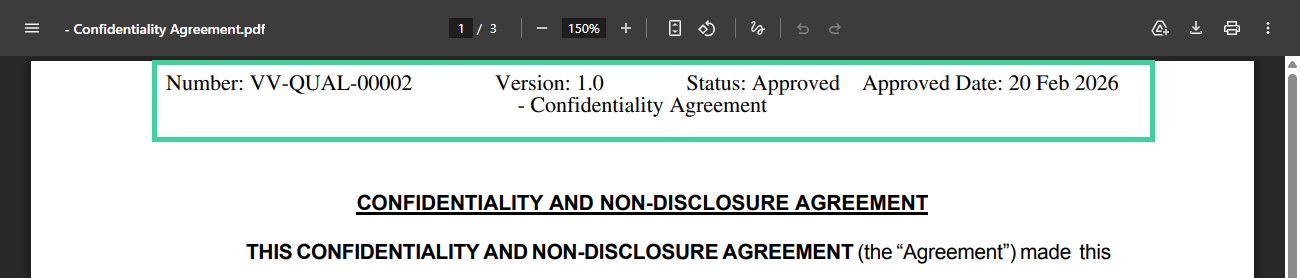
Veeva recommends using the built-in system workflows to sign documents. However, you may bring protected documents into your Quality Vault that were signed outside of Vault.
In order to preserve the integrity of those protected documents, by default Vault will not apply overlays to protected documents. Vault Admins can choose to apply an overlay when generating the viewable rendition of a protected PDF.
Example of PDF Overlay
Find Protected Documents
You can quickly find protected documents in your Vault by using filters or editing the columns in your library.
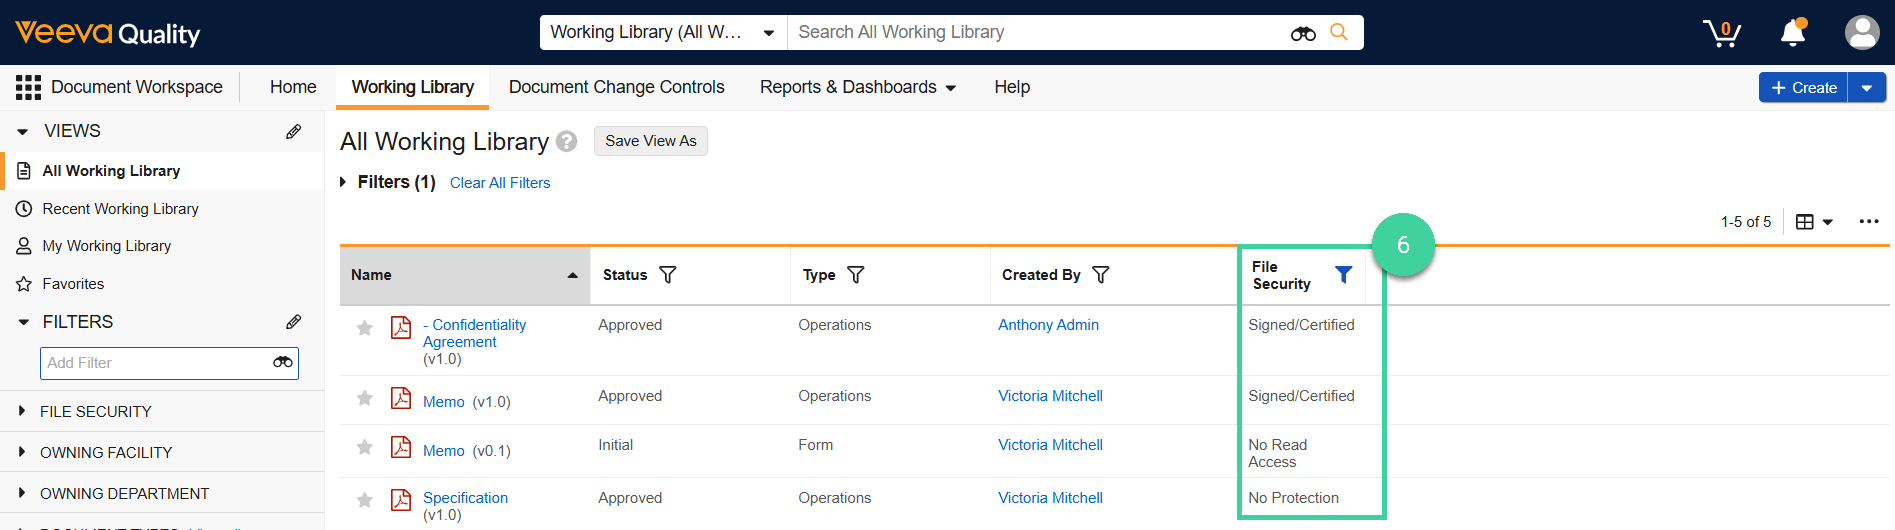
Use Filters
To find protected documents using filters:
Navigate to Document Workspace > Working Library.
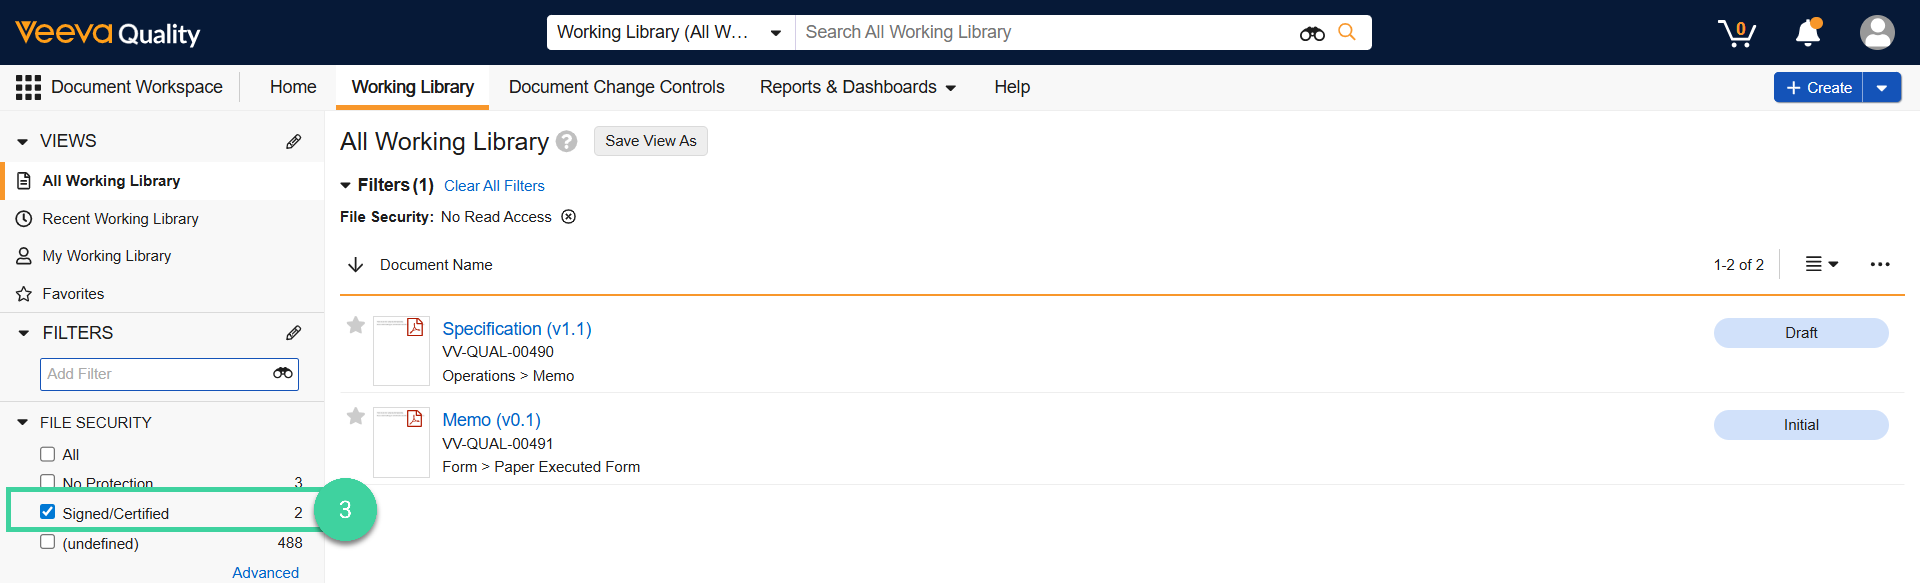
In the Filters area, select File Security from the dropdown.
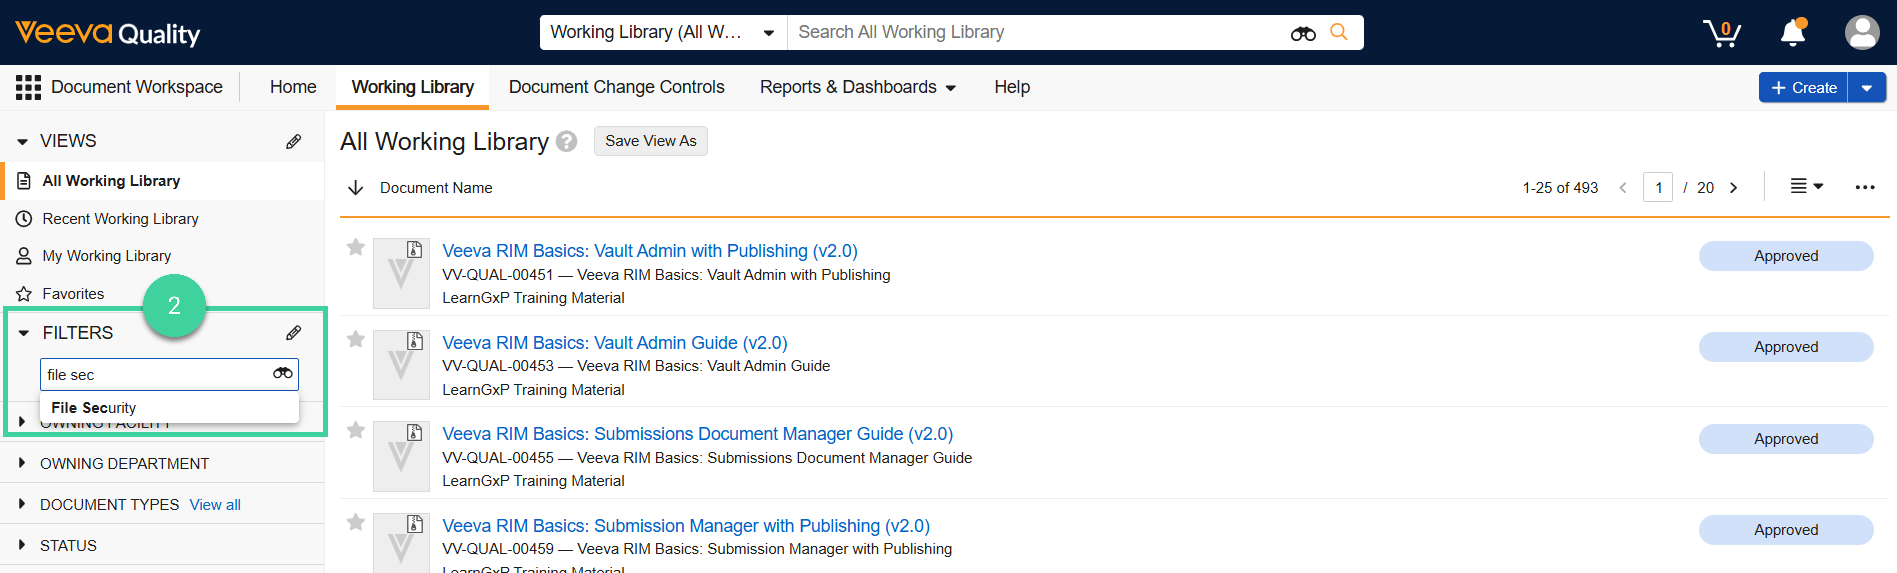
A count of documents matching each file security type displays. Select the file security type you want to filter for.
Add File Security Column
To find protected documents by adding the File Security column:
Navigate to Document Workspace > Working Library.
Make sure your layout is set to Grid View.

Select Edit Columns from the All Actions menu.
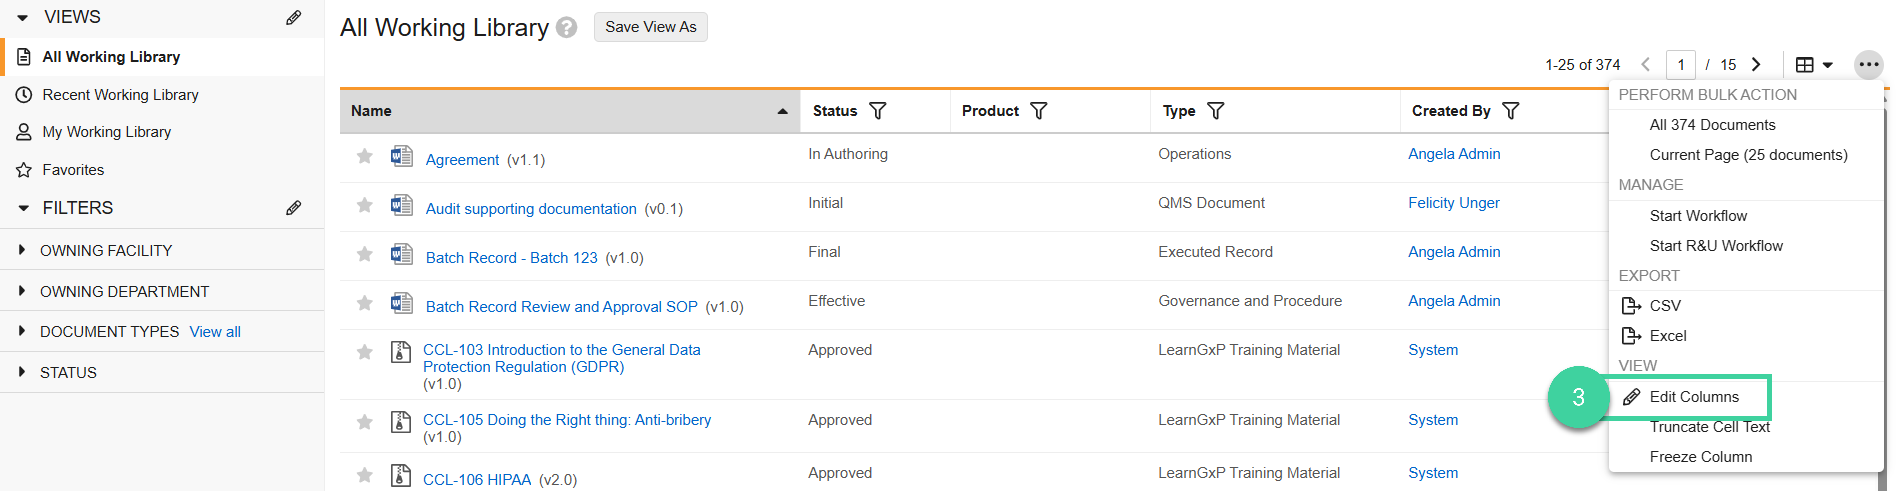
Add the File Security column.
Click Save.
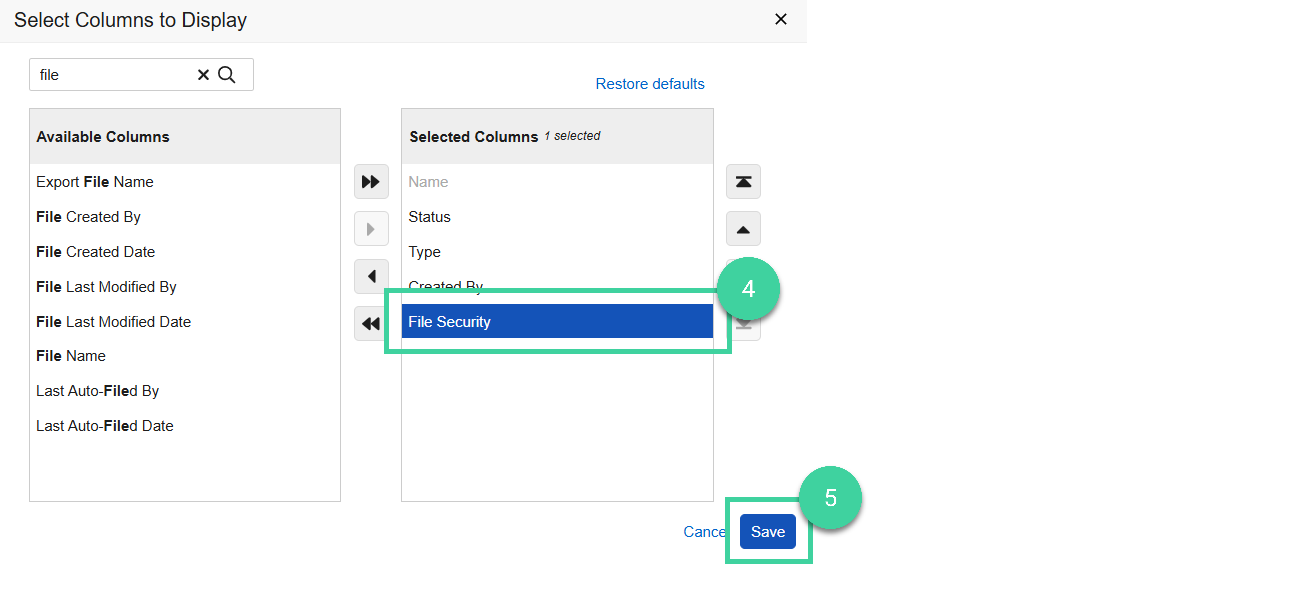
Use the File Security column to identify the protected documents.
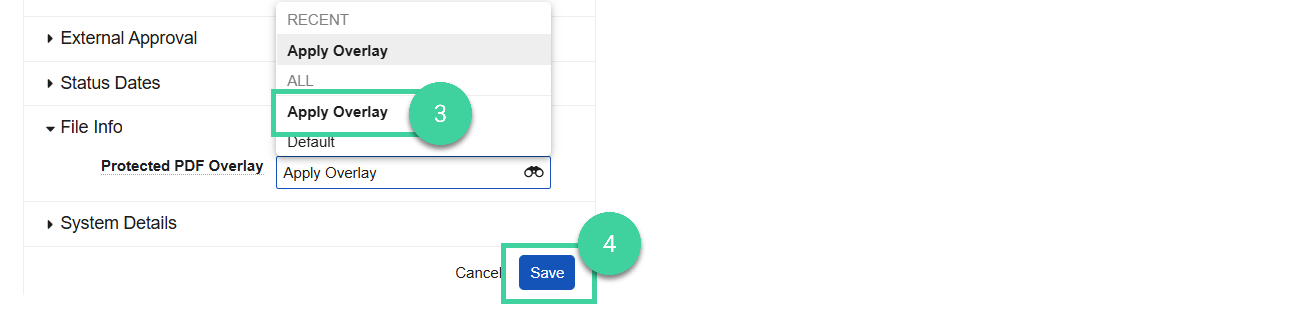
Apply PDF Overlay
To apply the PDF overlay to a protected document:
Open a protectd document.
Click Edit ().
In the File Info section, select Apply Overlay from the Protected PDF Overlay dropdown.
Click Save.
Note
The document will need to be manually re-rended for the new selection to apply.