Change Training Matrix States in Bulk
Last updated: Apr 17, 2026
Who can complete this task?
Veeva Quality Basics: Training Admin
When you have many lifecycle state changes to make in your trainig matrix, you can save time by changing the states of Learner Roles, Curricula, or Training Requirements in bulk.
You change the lifecycle state to any of the following:
- Retired
- Ready for Use
- Initiated
When you first create a Learner Role, Curriculum, or Training Requirement, it is in the Initiated state. You must change its state to Ready for Use before it can be used to create training assignments.
When a Learner Role, Curriculum, or Training Requirement is no longer applicable and should not be used to assign training, you can change its state to Retired, which cancels any associated open training assignments.
Best Practice
While actively working on updates to the training matrix, leave Learner Role, Curricula, and Training Requirement records in an Initiated state until updates are complete so that training is not sent to learners before it is fully ready.
Note
Changing the state of a Training Requirement from Ready for Use back to Initiated does not cancel any outstanding Training Assignments. It will place the Training Requirement in “mainetance mode,” where any updates won’t be considered until it is back to Ready for Use.
Warning
Retiring a Learner Role, Curriculum, or Training Requirement cancels any associated training assignments and is not reversible.
To change the state of learner roles, curricula, or training requirements in bulk:
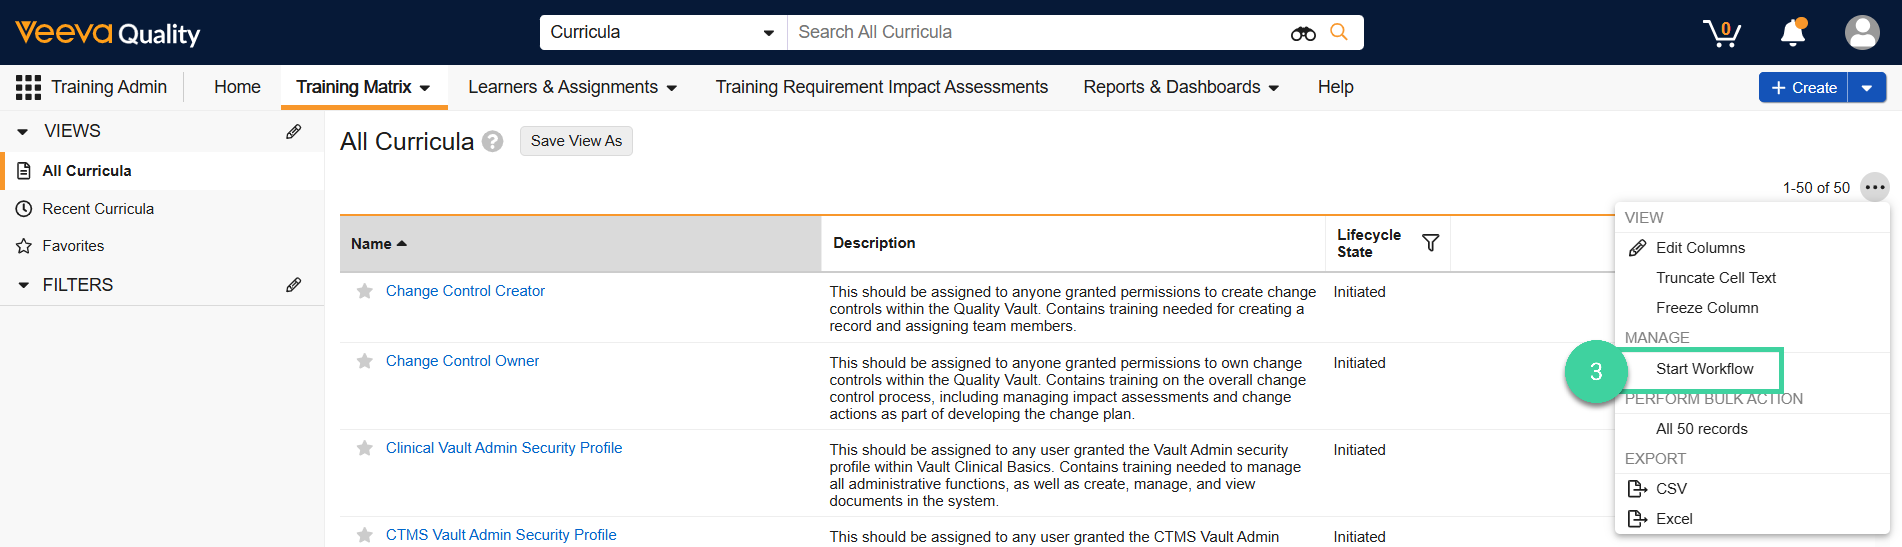
Navigate to one of the following:
- Training Admin > Training Matrix > Learner Role
- Training Admin > Training Matrix > Curriculum
- Training Admin > Training Matrix > Training Requirements
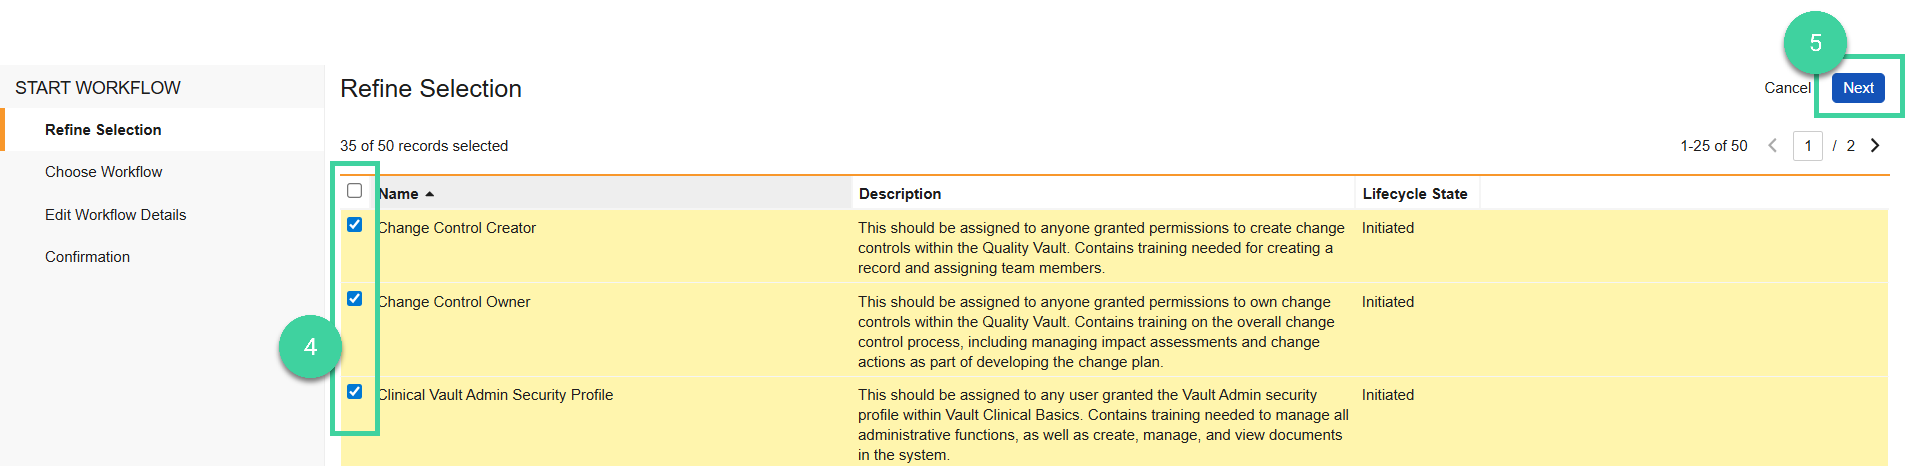
Use the views, search, or filters to narrow down the list of records. Once you’ve started the bulk editing process, you can deselect individual records, but you can only access filters and search at this stage.
Select Start Workflow from the All Actions menu.
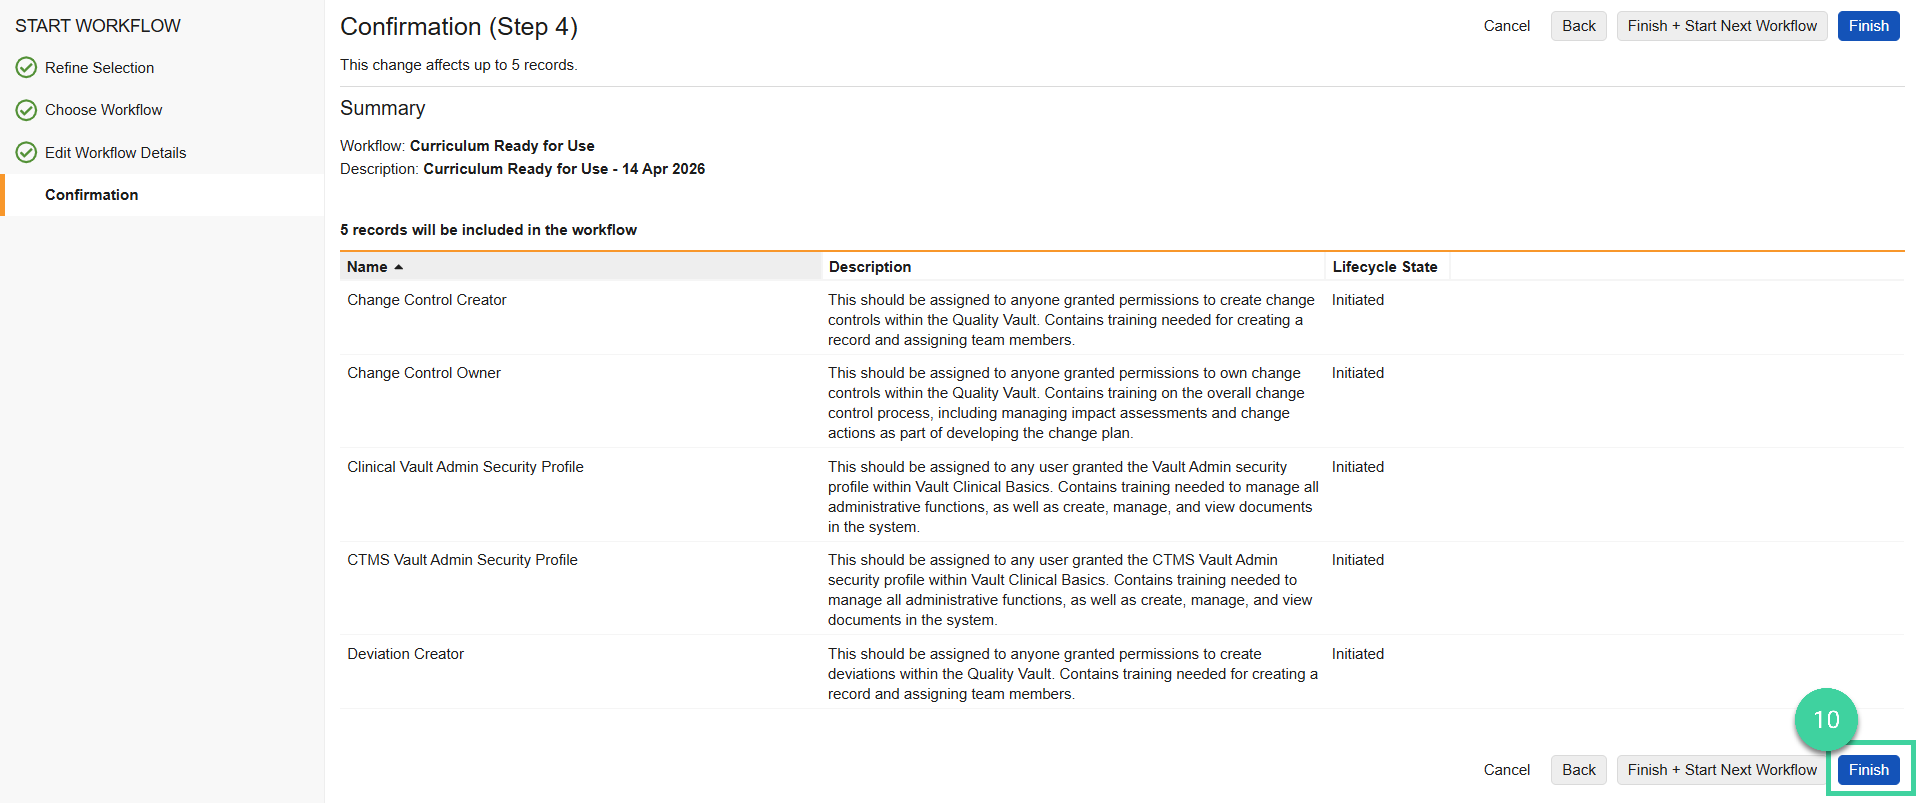
Review the list of selected records and deselect any that you do not want to include in the bulk update.
Click Next.
Select the new Lifecycle state for your records. You can only change the state of records that are in the same lifecycle and lifecycle state, so Vault displays only the available states by lifecycle and state.
Click Next

Edit the Description (if needed).
Click Next.

Review the summary of changes. Click Finish to proceed. You will receive a notification when the changes are complete.